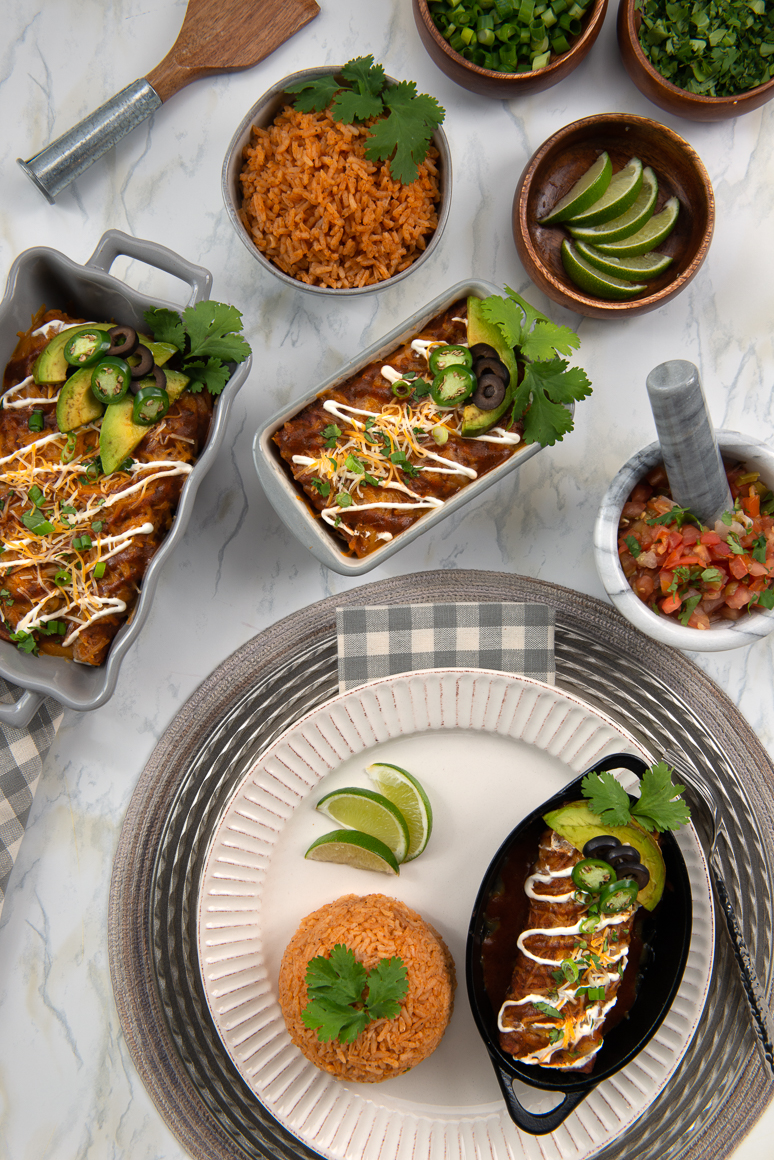
Chicken Enchiladas, Sauce and Spanish Rice

dish with small cast iron skillet with enchilada, rice and limes

Chicken enchiladas, Sauce and Spanish Rice

Do we have a treat for you!  Authentic style chicken enchiladas, enchilada sauce and a side of spanish rice!  Such a delicious meal.  Let’s get started.

Enchilada Sauce

There really isn’t anything difficult to making a delicious authentic style Enchilada Sauce.  It’s all in the recipe and this one is as good as it gets!  My hubby has perfected it.  Now this perfect recipe didn’t happen overnight and there were many adjustments before it became perfection.

What's in it? The Ingredients of course!

The ingredients are all pantry ingredients and you will likely have them on hand.   If not, they are quick and easy to find within the isles of your favorite store.  You’ll need; cooking oil, flour, cumin, garlic powder, salt, dried oregano, chili powder, chicken broth and water.  Was I right?  

Let's Make some Sauce!

You’ll need to add the oil to a medium sized sauce pan and heat it over medium heat.    Once the oil is heated add in the flour and stir with a whisk for about 30 to 60 seconds or until the raw flour is lightly toasted.  This will help with the flavor, as you do not want that raw flour flavor.  

Video Tutorial

We’ve added the following video tutorials to help set you up for success.  Don’t hesitate to watch them and as many times as you need to.  We want you to enjoy our recipes as much as we do!  

Adding the Dry Ingredients

Continue whisking as you add in the garlic powder, salt, dried oregano, cumin and finally, the chili powder.  We use a mild chili powder, but feel free to add a spicier chili powder.  Don’t forget keep whisking.

Be ready to add the fluid

We usually have all our recipe ingredients ready to go.  This includes fluids.  In this recipe, we will be adding in chicken broth and a small amount of water.   


You’ll need four cups of chicken broth.  Two cans of chicken broth is 3 1/2 cups.  Instead of opening another can of broth, we add 1/2 cup of water to round the fluid to 4 cups.

In goes the Fluids

While whisking and once all the dry ingredients are in your sauce pan, you’ll slowly add in your chicken broth and water.   Keep whisking until the wet and dry ingredients are thoroughly combined.  

Simmer

After adding in your chicken broth, reduce the heat to low or medium low and simmer for 10 minutes.   You’ll need to stir it occasionally during this time.   

Nothing To It

That’s it, nothing to it!  For years we purchased ready made enchilada sauce, never realizing just how easy it is to whip up.  This is the first part of our Chicken Enchilada meal and I’m excited for you to make your own!  Let us know if you have any questions.

Free Printable Recipe

Enchilada Sauce

Authentic Style Enchilada Sauce
Course: Main Course
Cuisine: Mexican
Servings: 12
Author: David Anderson

Ingredients

  • 4 tbsp Canola Oil
  • 4 tbsp Flour Stir to cook, 30 seconds-1 minute
  • 1/2 tsp Cumin
  • 1 tsp Garlic Powder
  • 1 tsp Salt
  • 1 tsp Dried Oregano
  • 8 tbsp Chili Powder we use mild
  • 4 cups Chicken Broth 2 cans=3 1/2 cups; just add 1/2 cup water

Instructions

  • Heat canola oil in a medium sauce pan.
  • Slowly sprinkle flour into heated oil, stiring constantly with a whisk until cooked or golden color. About 30 seconds to 1 minute.
  • Slowly add remaining ingredients, while constantly whisking together.
  • Immediately pour in chicken broth, stirring constantly with a whisk, until ingredients are combined.
  • Continue whisking to prevent clumping and allow liquid ingredients to heat and simmer. This should only require a minute or two.
  • Once ingredients have started simmering reduce heat to medium high heat and simmer for 10 minutes.
  • Allow to cool time before making enchiladas.
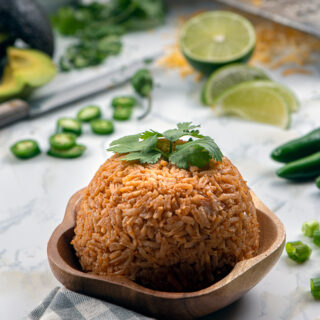
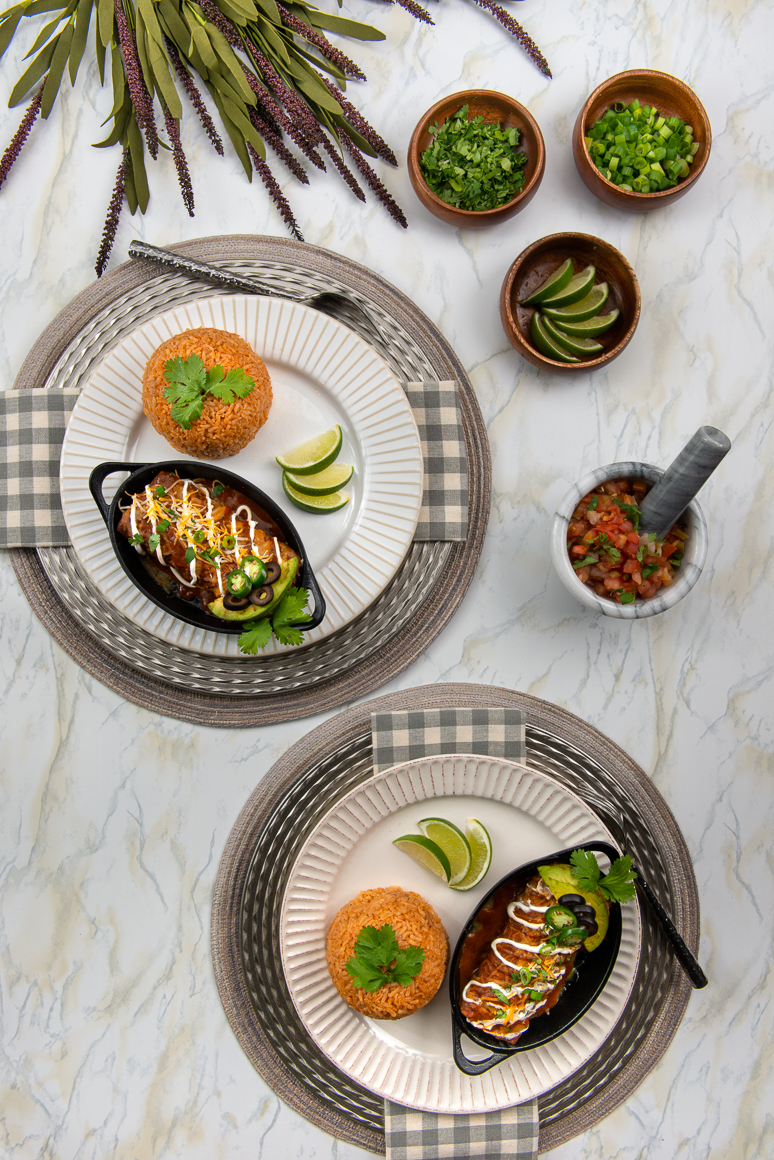
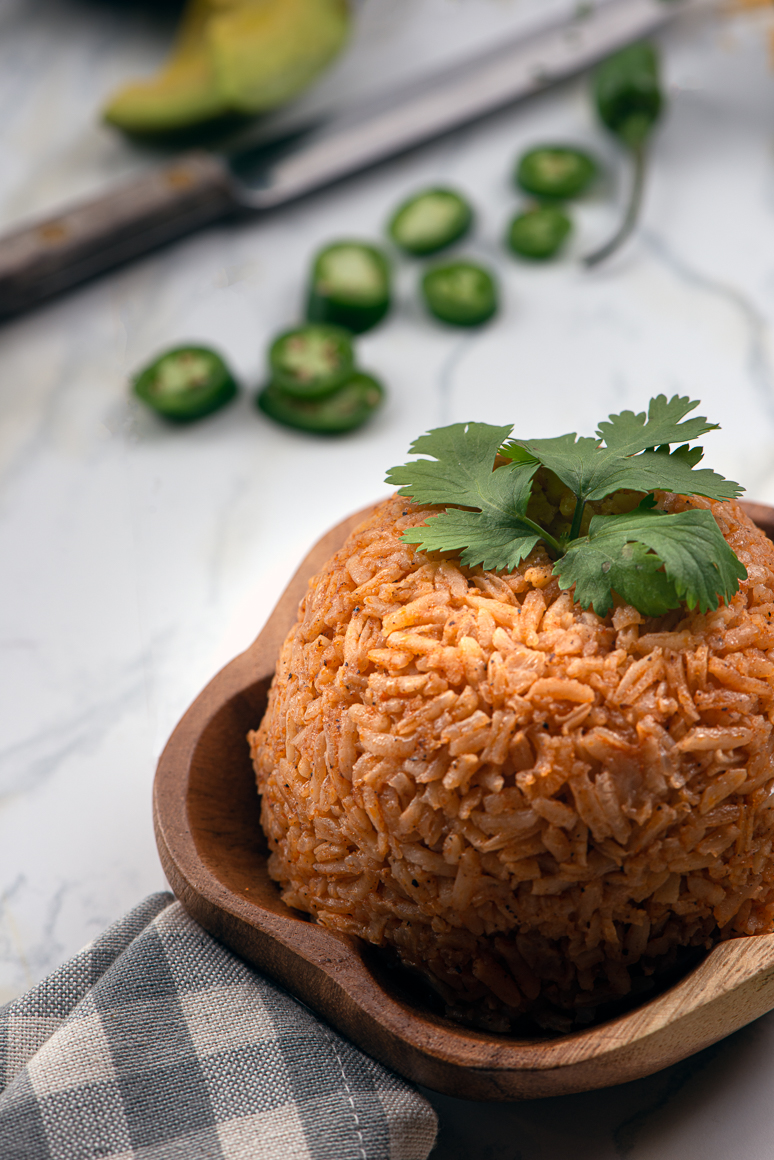
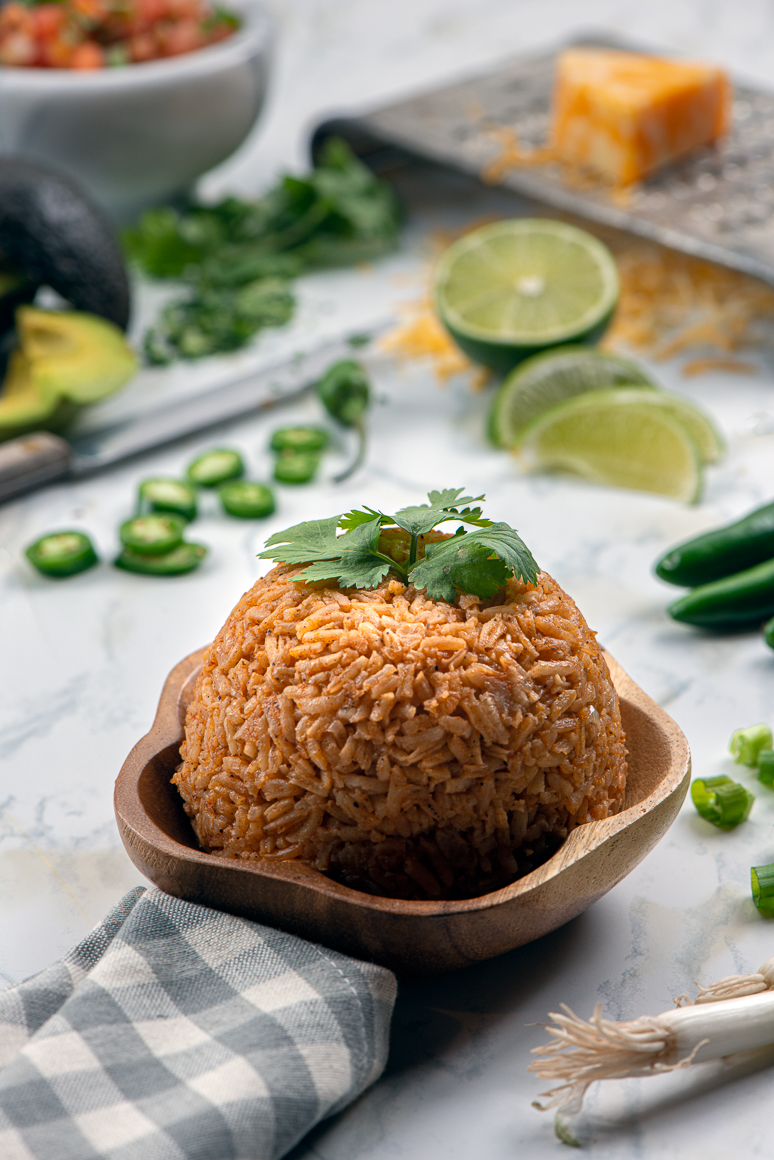
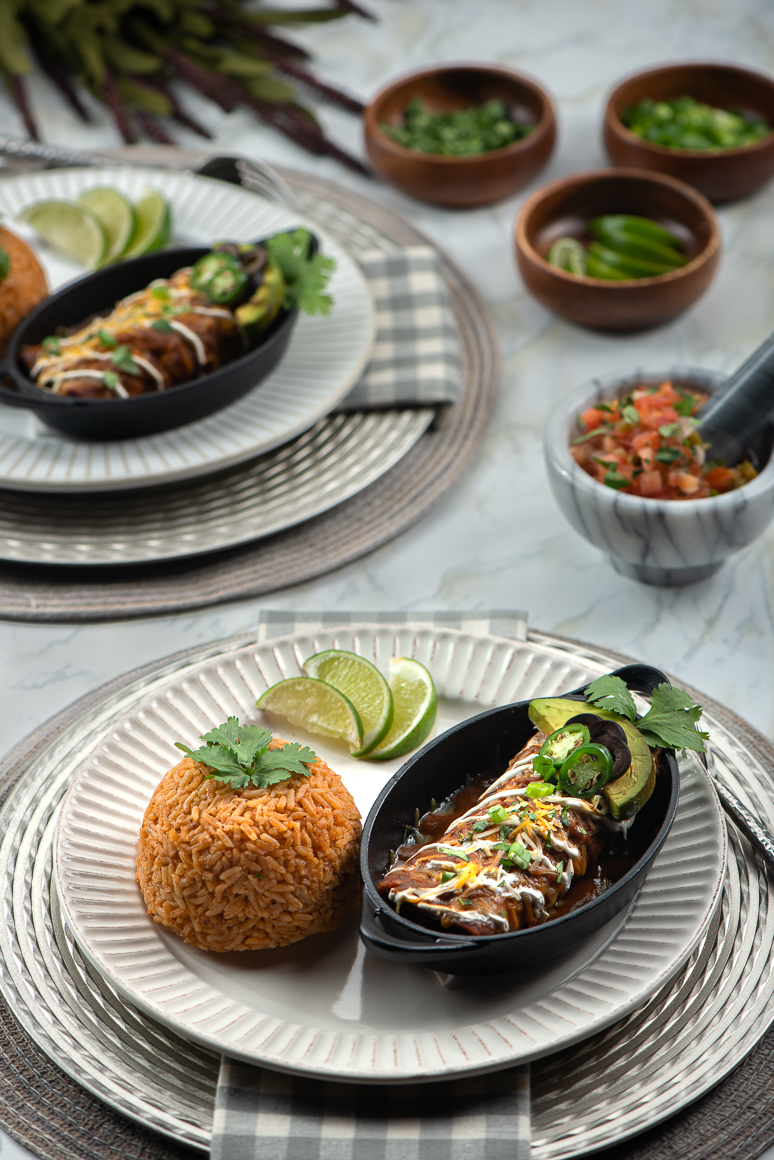
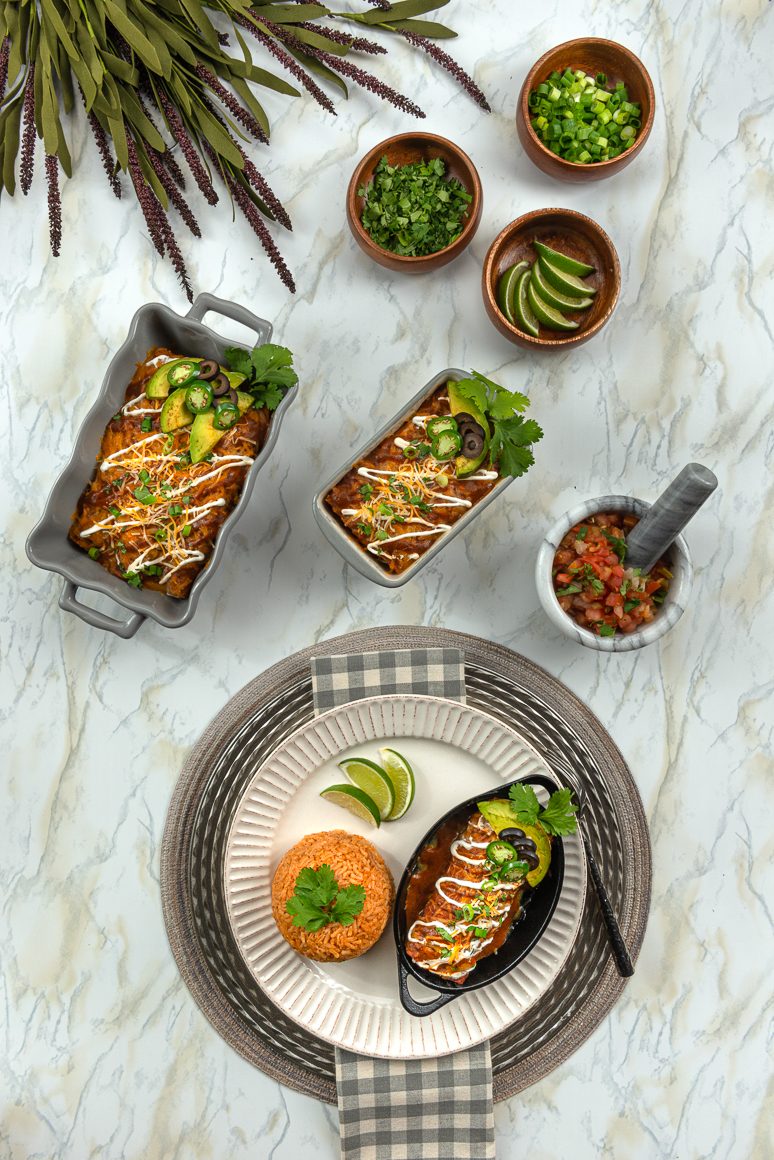
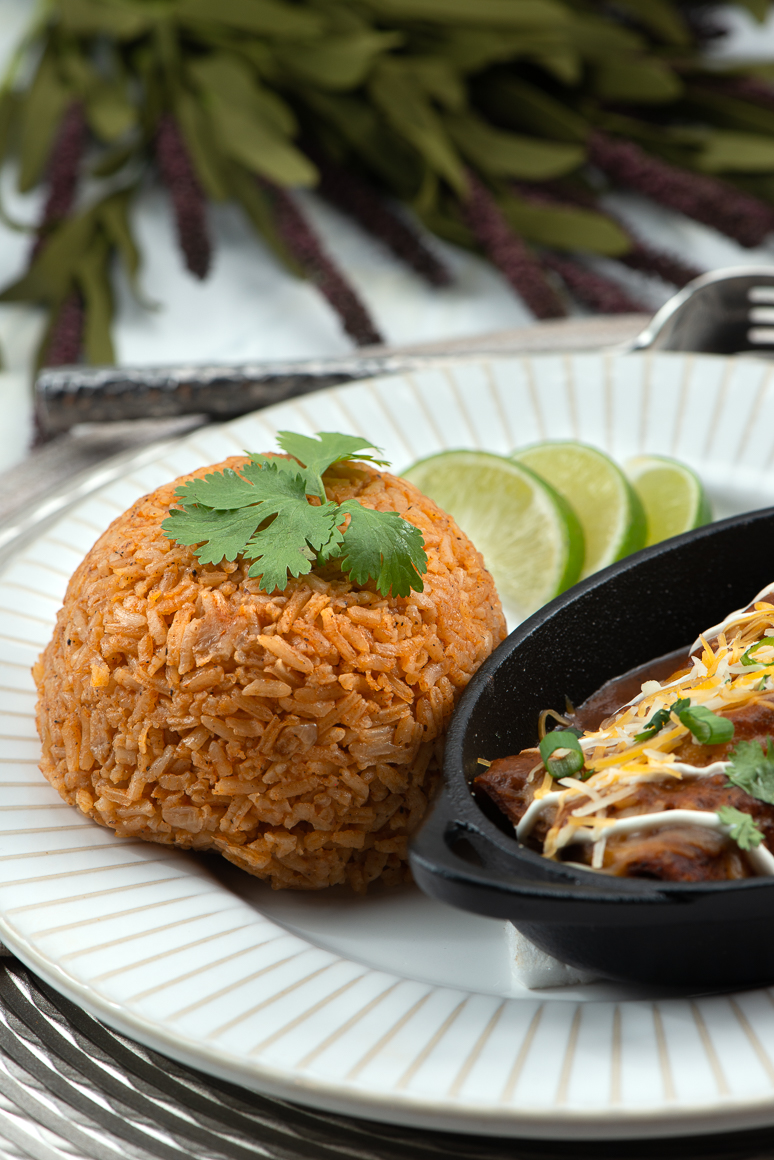
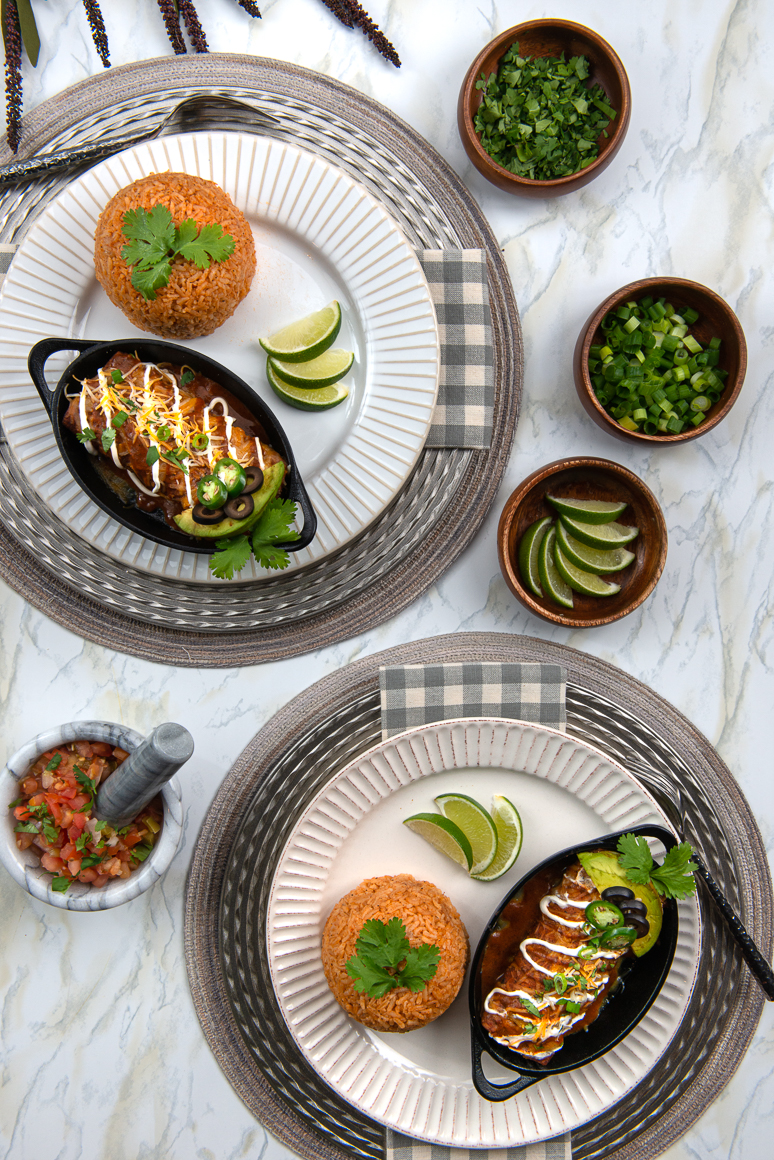
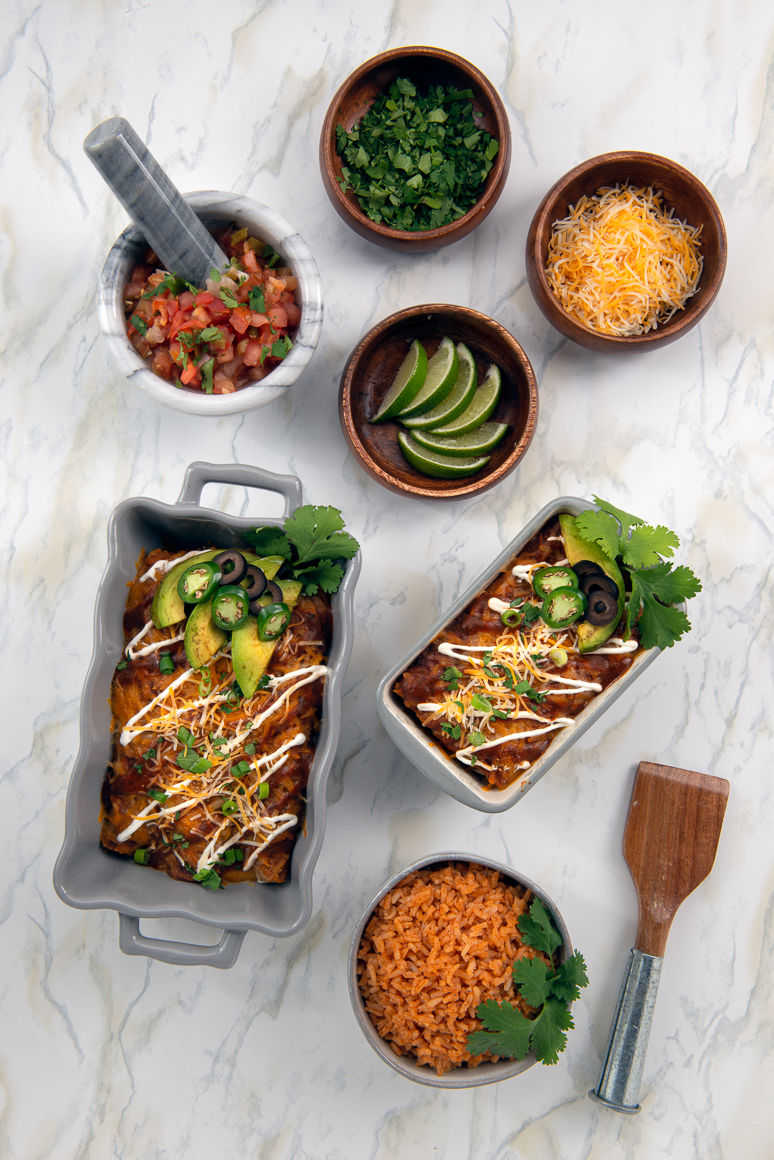
Photography

"Spanish Rice" the next part of our Chicken Enchiladas, Sauce and Spanish Rice Meal

While researching for this post, I was curious to know why is it called Spanish Rice?  Didn’t it originate in Mexico?  


The Spaniards brought rice to Mexico in the 1500’s.  Among other things, they brought to Mexico rice from Asia.  It seems the name was derived because the Spanish introduced Mexico to rice.  Even though Spanish rice from Spain is made differently than Mexico’s Spanish Rice, the name held.

What's in Spanish Rice?

Our recipe includes the following ingredients:  long grain rice, oil, finely chopped onions, tomato sauce, water, onion powder, garlic powder, butter, salt and pepper.  Again, very basic ingredients that we may have in our pantry right now.

Shall We Begin?

We begin by gathering all the ingredients together, measuring them out and basically having them near at hand, prepped and ready to go.  This also includes placing a medium sized sauce pan on a burner over medium heat.

Video Tutorial

It’s all about setting up for success and we hope the following video tutorial will help with that!

Now that your sauce pan is heated add the oil

Once your sauce pan is on add the oil.  When the oil is heated begin sauteing your finely chopped onions.  You’ll sautee them until tender and about 5 minutes.  

Add Butter and Rice

When the onions are tender, add the butter and allow it to melt.  We enjoy the creamy flavor butter adds to this dish.  


The rice goes in next.  You’ll saute it for approximately 5 minutes and when it has a toasted golden tone.  


Next add in your dry ingredients.  Which are salt, garlic powder, and onion powder.

Water and Tomato Sauce

Slowly begin adding in your water and tomato sauce as you continue stirring the rice, and watch out or you’ll get a steamy facial.  🙂


Bring the water and tomato sauce to a boil.  Cover with the sauce pan lid, reduce heat to low and allow to cook for 16 minutes.

Tip:  DO NOT REMOVE THE LID…LEAVE IT ON!

Almost done

Once your 16 minute timer goes off, remove your saute pan from the burner and allow to rest for an additional 5 minutes….and do not remove that lid, yet.


After 5 minutes, remove the lid, fluff with a fork, serve and enjoy!

Free Printable Recipe

Spanish Rice

Simple and easy homemade spanish rice.
Course: Side Dish
Cuisine: Mexican
Keyword: Spanish Rice
Servings: 8
Author: David Anderson
Cost: $5.00

Ingredients

  • 2 tbsp Oil
  • 1/4-1/2 cup Finely chopped onion We use yellow onions.
  • Salt and pepper sauteeing onion to taste
  • 1/2 can Tomato Sauce
  • 1 cup Long grain rice
  • 2 cups Water
  • 1/2 tsp Salt
  • 1/2 tsp Garlic Powder
  • 1/2 tsp Onion Powder
  • 2 Tbsp Butter

Instructions

  • Heat oil over medium heat and in a medium-sized pan with lid, we'll use the lid later in this recipe.
  • Add chopped onions to oil and saute until they are tender and about 5 minutes. Salt and pepper the onions to taste.
  • Add the butter to the oil and onoins and allow to melt completely.
  • Add in the rice and saute for 5 minutes or until the rice has toasted.
  • Once the butter has melted and heated, and in the rice. Stir to coat the rice with the oil and butter, also to mix sauteed onions into the rice,
  • Sautee the rice mixture for 5 minutes.
  • Add-in the Salt, Garlic powder, onion powder and stir into the rice.
  • Slowly stir in the water.
  • Stir in the 1/2 can of tomato sauce.
  • Bring to a boil, cover pot with its lid, reduce heat to the low setting, and cook for 15 minutes. Remember to leave the lid on and do not open to examine or stir the rice.
  • After the 15 minutes, turn off your burner and remove the pot from the heat and allow to rest for 5 minutes.
  • After the rice has rested for 5 minutes, remove the lid from the pot and fluff with a fork.
  • Serve and enjoy!

Beautiful photography

Chicken Enchiladas

You are in for a treat, delicious homemade chicken enchiladas with red sauce.  There isn’t anything better than shredded chicken with layers of delicious cheese, black olives, red sauce, and corn tortillas all rolled up into a tasty mouthwatering bites of delight.  

Prepping

It’s important to have all of your ingredients prepped and ready to go.  In this post, we’ve already prepared our red sauce and will have that resting while it also cools down.  Our oven will be preheating, and our baking dish will be spritzed with non-stick spray.

For this recipe prepping is fairly simple.  Shredding the rotisserie chicken,  grating the cheese or in our case opening the prepackaged bag, draining a small can of sliced black olives. and frying up your tortillas.  

Frying the Tortillas

Everyone has different tastes and you can choose any variety of tortilla you prefer, or whatever you have on hand.  Although, I enjoy flour we both, hubby and I, like the yellow corn tortilla.


Heat your oil in a medium to large frying pan, adding in the oil.  Once it’s heated you can begin frying your tortillas.  It doesn’t take long, just 10 to 15 seconds.  You want to soften the tortilla so they are pliable but, not so soft that they tear. 


Be sure to allow any excess oil to drain away, then place them on a thick layer of paper towels and have more to hand pat away additional oil.  Continue until all of the tortillas are fried and ready to go.  

Let's get this rolling

Rolling enchiladas that is!  My parents used to run a very successful catering business and occasionally we’d be recruited to help make tortillas.  Now mind you, we are talking about enough to serve 300 people or more. 


I learned back then the best way is to create an assembly line, of sorts, to speed things along.  I’m sure it also, helped my parents make sure each layer of ingredients made it into each enchilada.

Video Tutorial

Assembly line

Dave and I like to complete the rolling process together and making up an assembly line of ingredients works best for us.  


Our line begins with the fried tortillas, a pie plate filled with enchilada sauce, a large measuring cup with extra red sauce, a work surface for me to roll on, seperate bowls filled with cheese and black olives, and of course that baking dish we spritzed with non-stick spray.


Before we begin, we will add red sauce to our shredded chicken.  Not much, just enough to moisten the chicken and infuse it with more flavor.

Let's get Messy

We get messy, there is no way to avoid it, for us anyway!  But it is soo worth it!  Anyway, we begin by dipping a tortilla into our pie plate of red sauce, next layering on the chicken, drizzel on a little red sauce, cheese, olives, then the roll, and into that baking dish. Before you know it and after time together chatting you’re done rolling!


Next, pour some of your reserved red sauce over your rolled enchiladas and top with cheese.  You could also, pour some over the bottom of your baking dish before you begin rolling your enchiladas.  Either way works.

Get into my oven

By now, your oven should be preheated to 350 degrees.  Cover your baking dish with foil for the first 15, then remove the foil and allow it to continue baking for another 10 to 15 minutes.  Just keep your eye on it and remove it before it overcooks.    

Final Thoughts on our Chicken Enchiladas, Sauce and Spanish Rice

These recipes are oh so good, and we hope you’ll give them a try.  Especially, the enchilada sauce.  We’re pretty sure once you try it you’ll never go back to pre-made!  


You can also, make these up ahead of time, refrigerate and pop them in the oven whenever you’re ready.  I’d suggest setting them out and allow them to come to room temperature prior to popping them in your oven.


All the recipes are simple and easy.  Another easy recipe that’d compliment this meal is our Winter Salsa Recipe!  Ones your family and friends will love and be impressed by!   


Please drop us a comment and let us know how you like these recipes!  

Photography

I so, so love photography!  All genres, but food photography is right up at the top of the list.  If you haven’t done so yet, head over to my portfolio to have a look.   I plan to include more to my personal project tab, very soon.   


In the meantime, I hope the following photos will tantalize and encourage you to give these recipes a try.


Free Printable Recipe

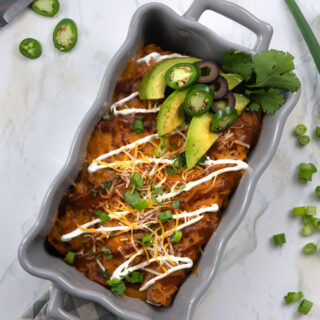
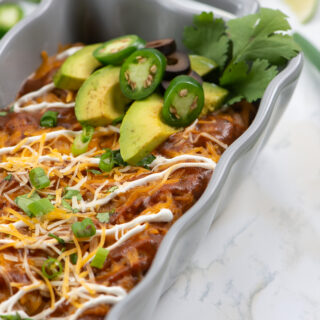
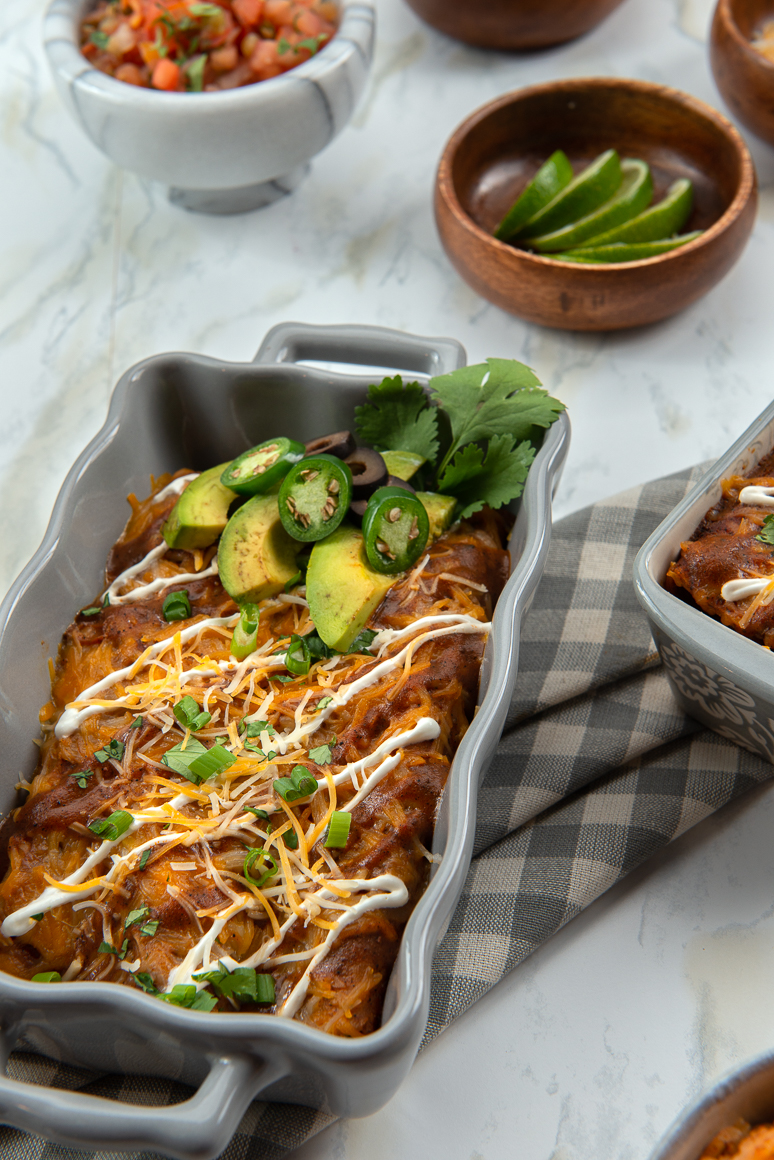
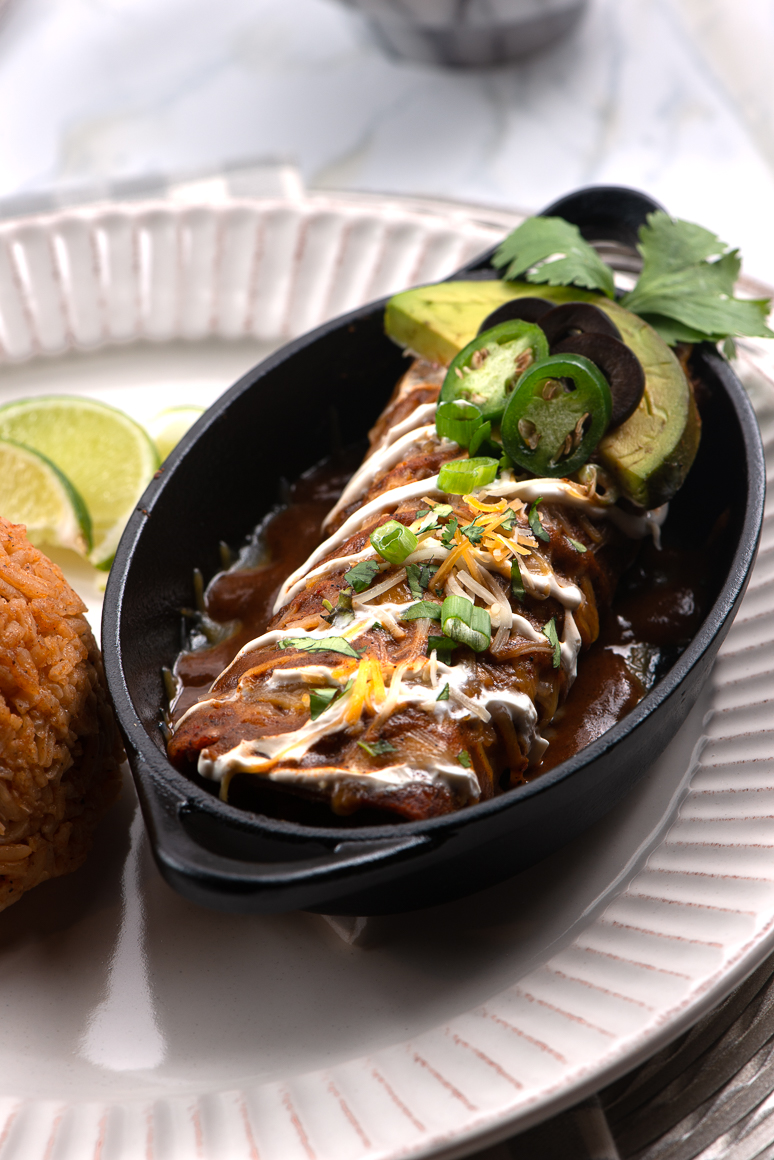
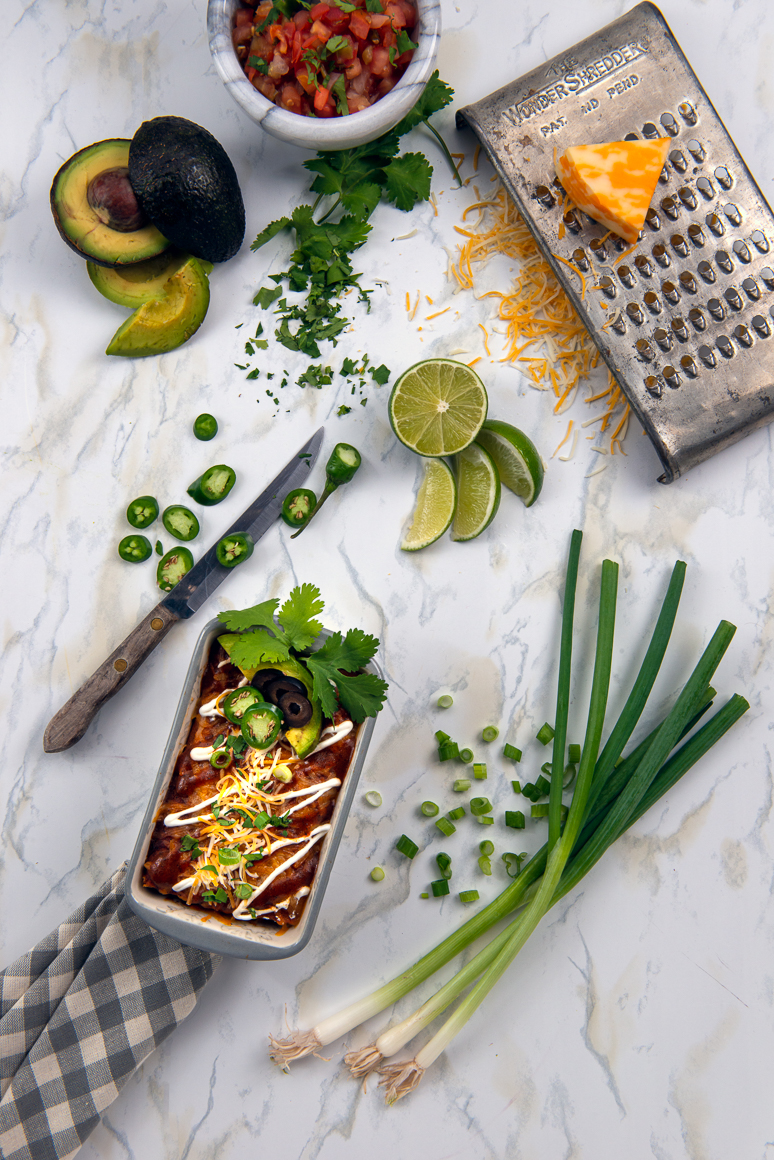
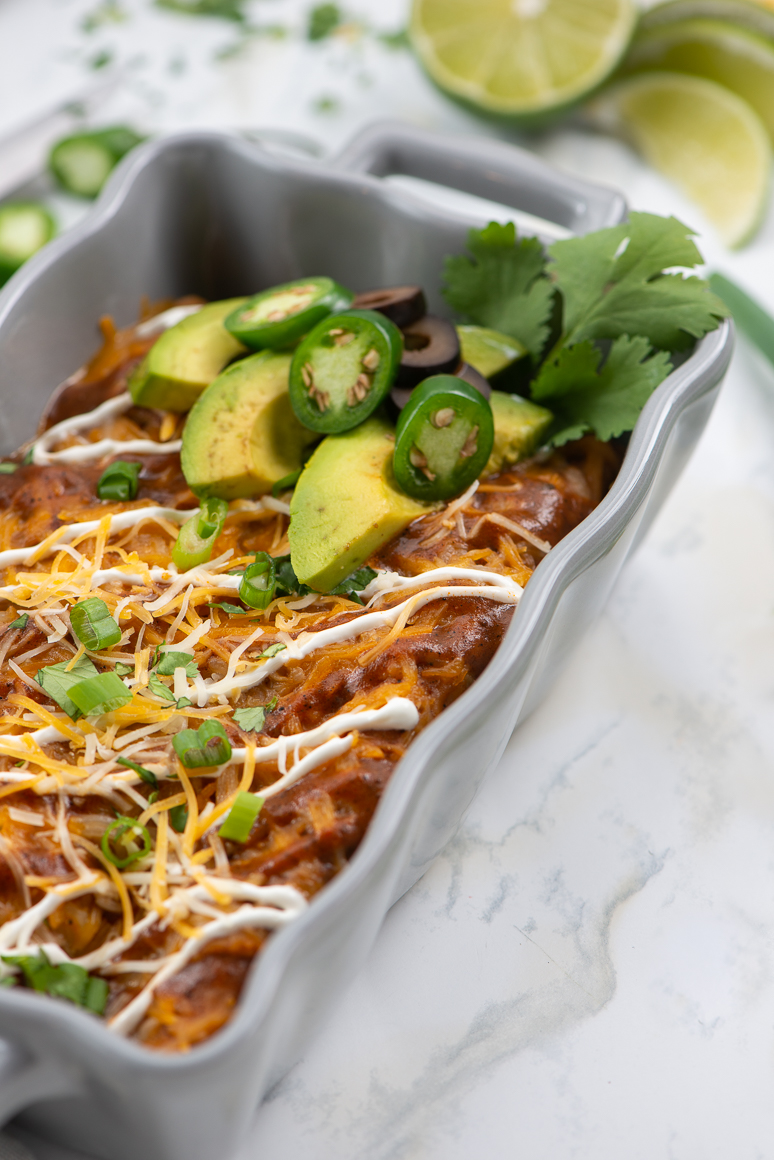
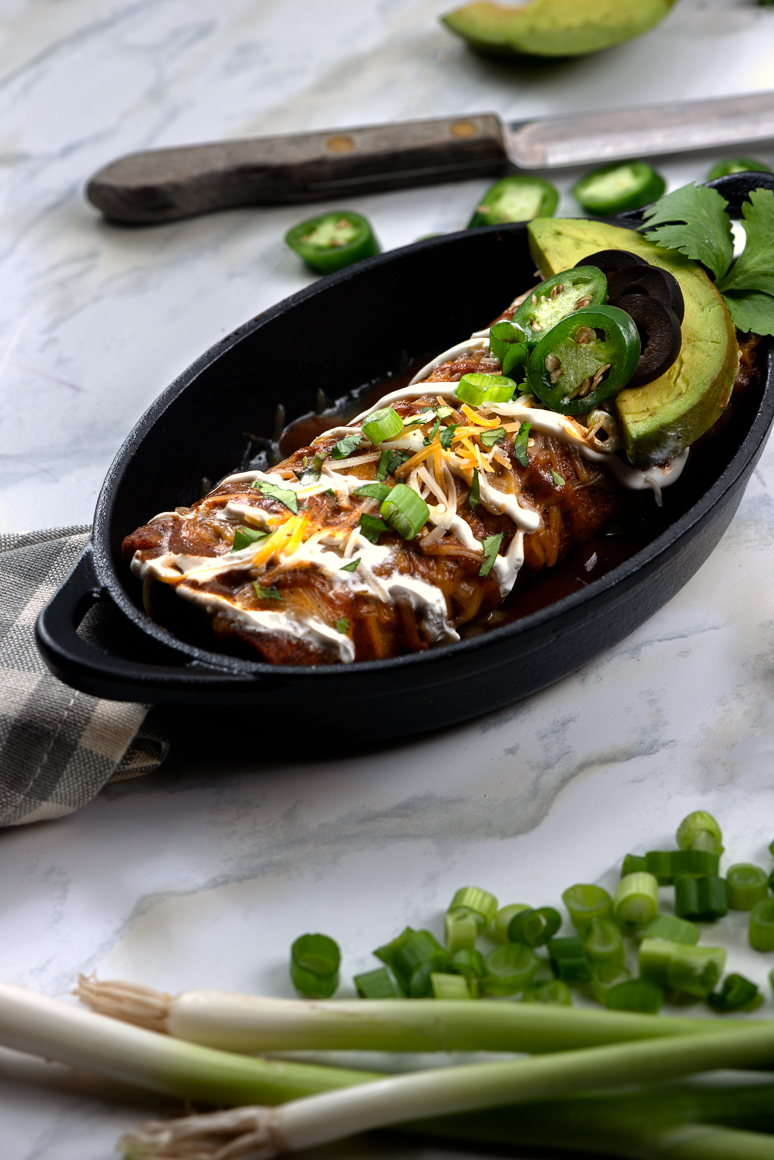
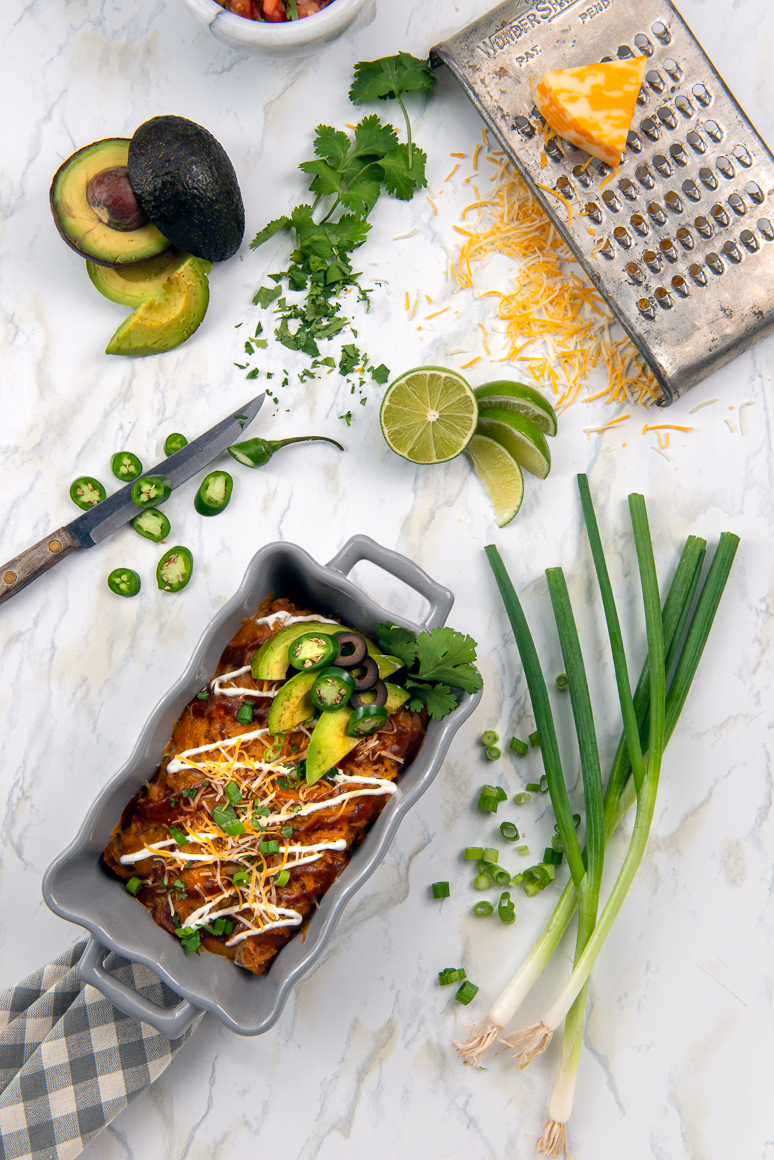
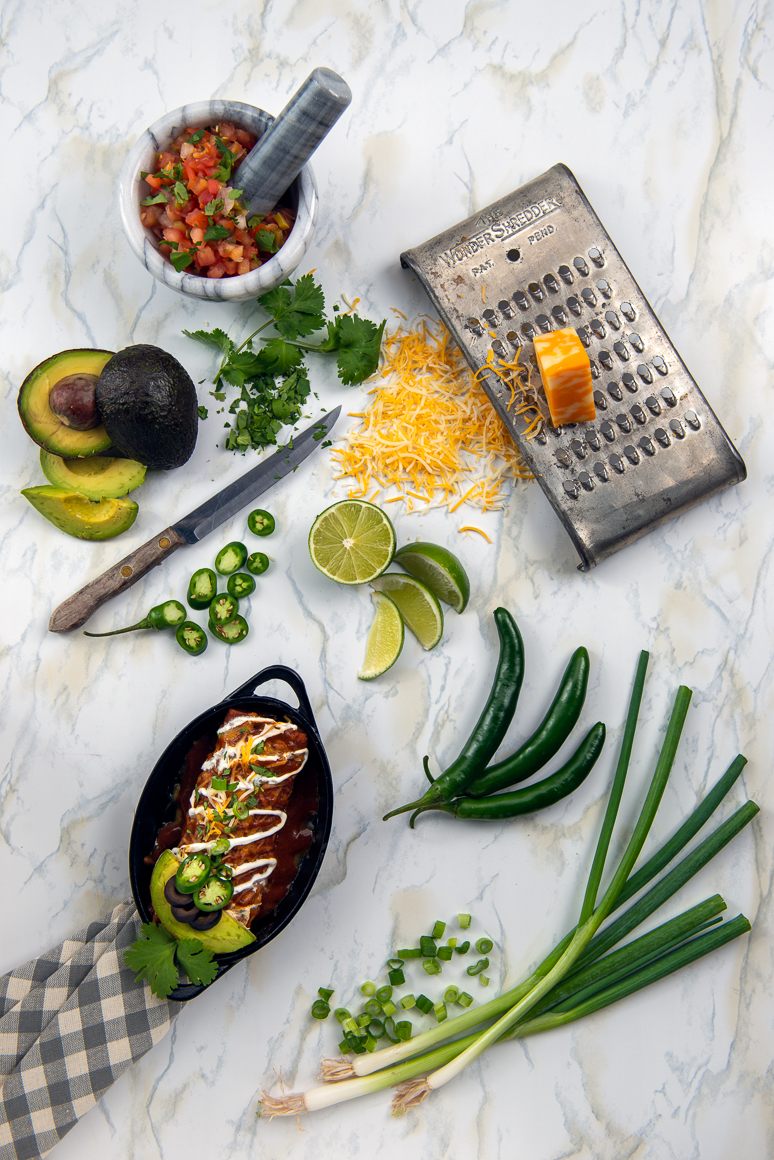
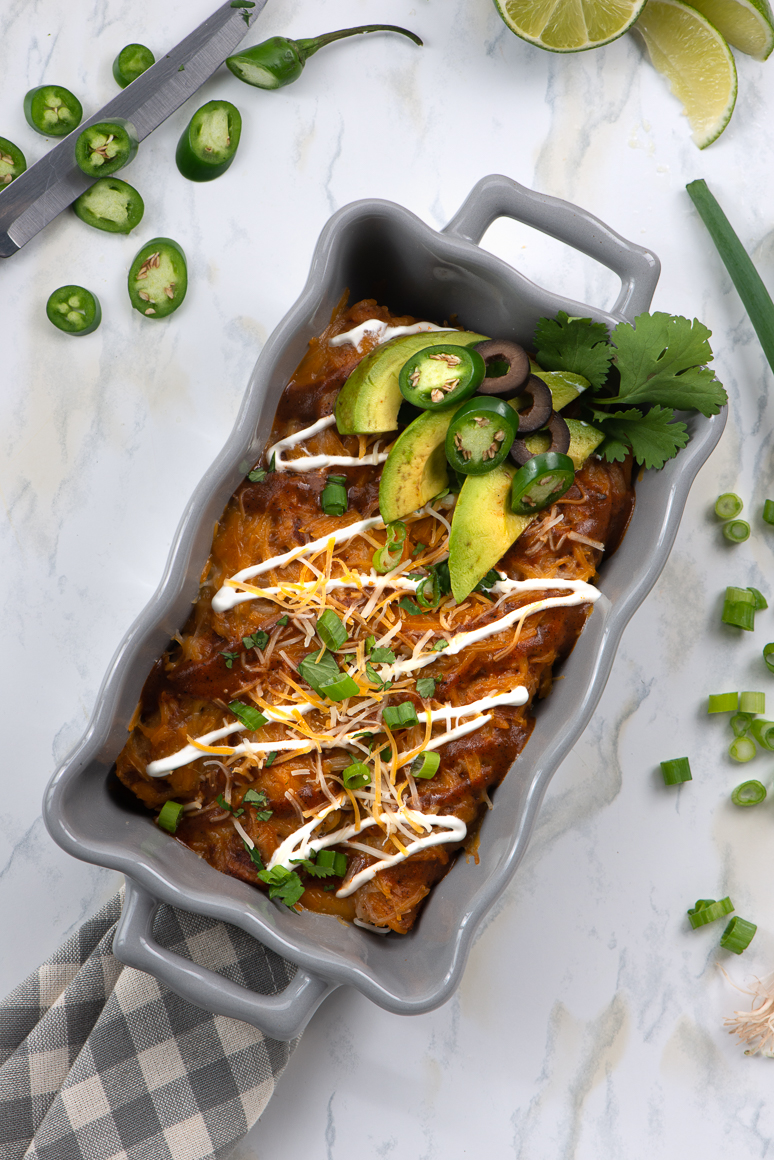
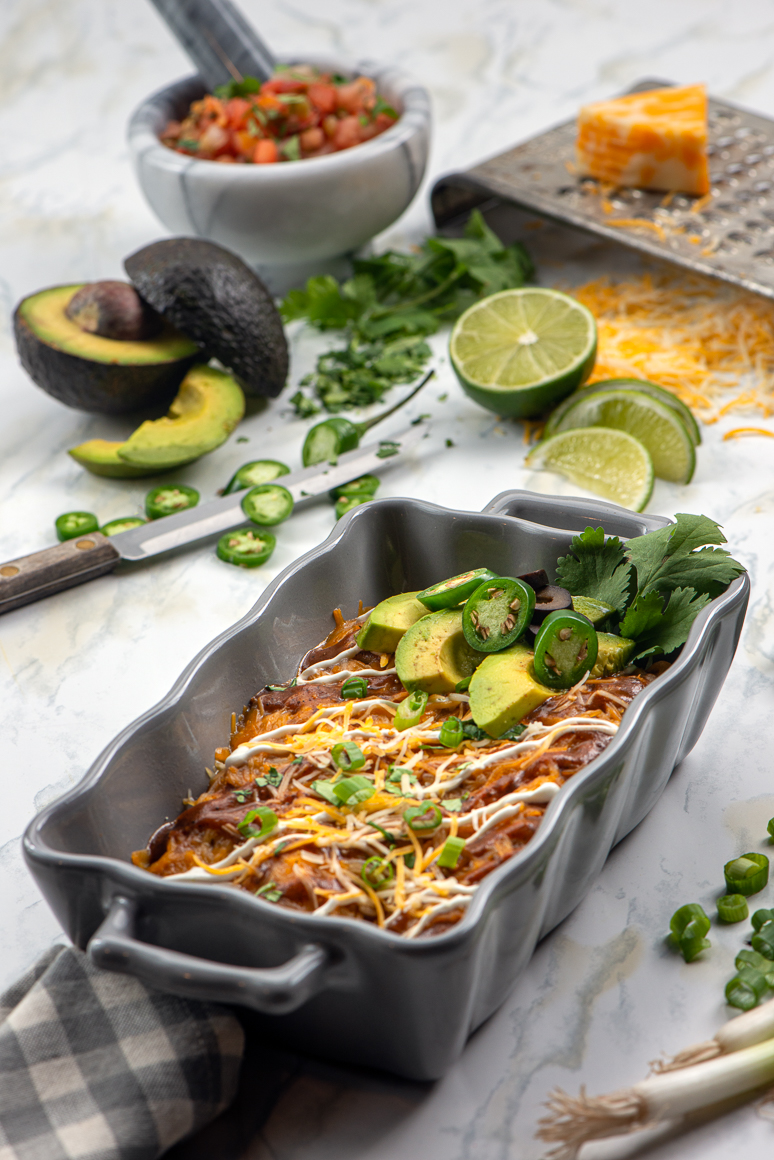
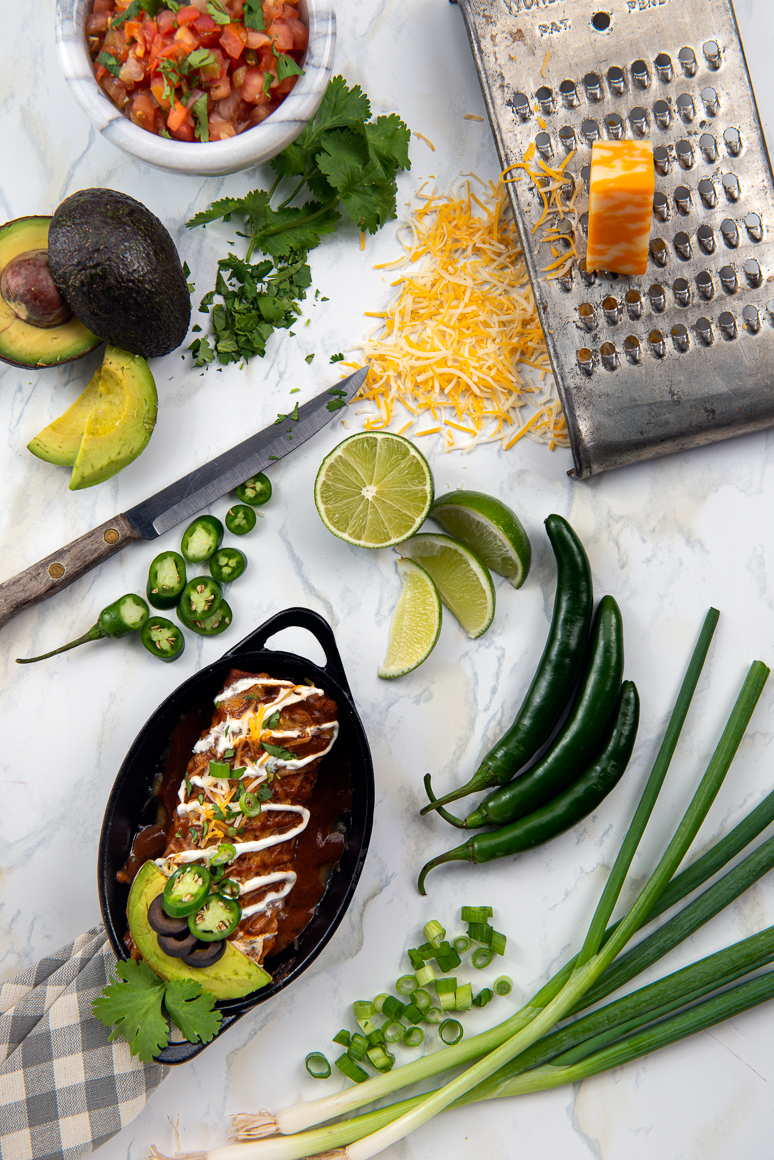
Chicken Enchiladas with Red Sauce

Authentic Mexican style chicken enchiladas with red sauce
Course: Main Course
Cuisine: Mexican
Keyword: Chicken Enchiladas with red sauce
Author: David Anderson

Equipment

  • Large Baking Dish, sprayed with non-stick spray.

Ingredients

  • 1 Rotisserie Chicken Shredded
  • 1 recipe of our easy and delicious enchilada sauce
  • 1 can Sliced olives
  • 1 package Corn tortias
  • 1 package Mexican blend shredded cheese 1 package is two cups of blended cheese

Instructions

  • Preheat oven to 350 degrees.
  • Shred the rotisserie chicken and place it into a medium to a large mixing bowl. Add some enchilada sauce to coat chicken, not much.
  • In a large skillet add oil and fry each of your tortillas, one at a time, until softened 10 to 15 seconds each. Drain off excess oil and transfer to a paper plate lined with several paper towels. Pat dry each tortilla with additional paper towels to remove excess oil.
  • After your tortillas are prepared, assemble your ingredients into an assembly line. We will start with our prepared and stacked tortillas, a partially filled pie plate of enchilada sauce, pot with remaining enchilada sauce, a bowl of shredded chicken, a bowl with the cheese, a small bowl of the sliced olives, a large work surface (we use a chopping board), and your baking dish sprayed with non-stick spray.
  • Dip a tortilla into the pie plate of enchilada sauce coating both sides. Allow excess sauce to drain off and lay flat onto your chopping board or work surface.
  • 1/3 of the way into your flat laying tortilla add a line of shredded chicken.
  • Using a large spoon or ladle add a tablespoon of enchilada sauce over spread-out chicken.
  • Sprinkle shredded Mexican blended cheese over chicken and top with sliced black olives.
  • Roll the tortilla over fillings, starting closest to you, until fillings are wrapped within one tortilla, and place into your large baking dish.
  • Continue the above steps until your baking dish is filled with rolled enchiladas.
  • Using a measuring cup, pour more enchilada sauce over your rolled enchiladas.
  • Top with cheese and cover with foil.
  • Place the baking dish into your preheated oven and bake for 15 minutes.
  • After 15 minutes, remove the baking dish from the oven and remove foil. Return to oven for another 10 minutes or a total cook time of 25 minutes.
  • Allow to rest 5 minutes then serve and enjoy!

Find Us On Social Media

Foto Visualista is part of the social media scene.  Please add and follow us on Facebook, Instagram, Pinterest, YouTube and Twitter.  Pin our posts, tweet them and share them!  Follow us to stay current and share us with your friends!

Thank You!!!

We are grateful for your interest and especially your visits here on the Blog.  Be sure to add your name to our email subscription list!

Above all we appreciate you and look forward to seeing you around the blog, very soon!!!

4 Responses

Leave a Reply

Your email address will not be published. Required fields are marked *

Recipe Rating


Get these "Free" Keto Recipes today!

join the family

Subscribe to our mailing list.