This is a nice spin on fried mozzarella cheese sticks. These Easy and Delicious Fried Cheese Sticks are easy and ready in less than an hour. Perfect for ladies night, game days, Super Bowl Sunday and … for any ole reason.
The excitement for this year’s Super Bowl is off the charts. Well, for me anyway. The 49ers vs Chiefs! I’ve been a 49er fan since the days of Montana and Rice! I’m not the fan knowing all the stats, can’t/won’t talk smack and I don’t have any superstitions. But, I’m all for a good football season. What a better way to end the season than with the final big game, Super Bowl!
I’ve veered off a little here. But, this recipe will be perfect for the big game. I love an Easy and Delicious Fried Cheese Stick starter..well who doesn’t, right? Plus, it’s only three okay, four ingredients if you count the oil.
Before I list the ingredients, let me tell you why I went in search of an easy starter; our grandson. We share early exit Wednesday afternoons together. He’s 5 and selective about the foods he eats. Does that sound like a child you may know, lol? My thought was, teach him to cook and he’ll learn to love food. That’s how our cooking adventures started and why I decided on this recipe. Little did I know that adults would love this starter, too.
Prepping
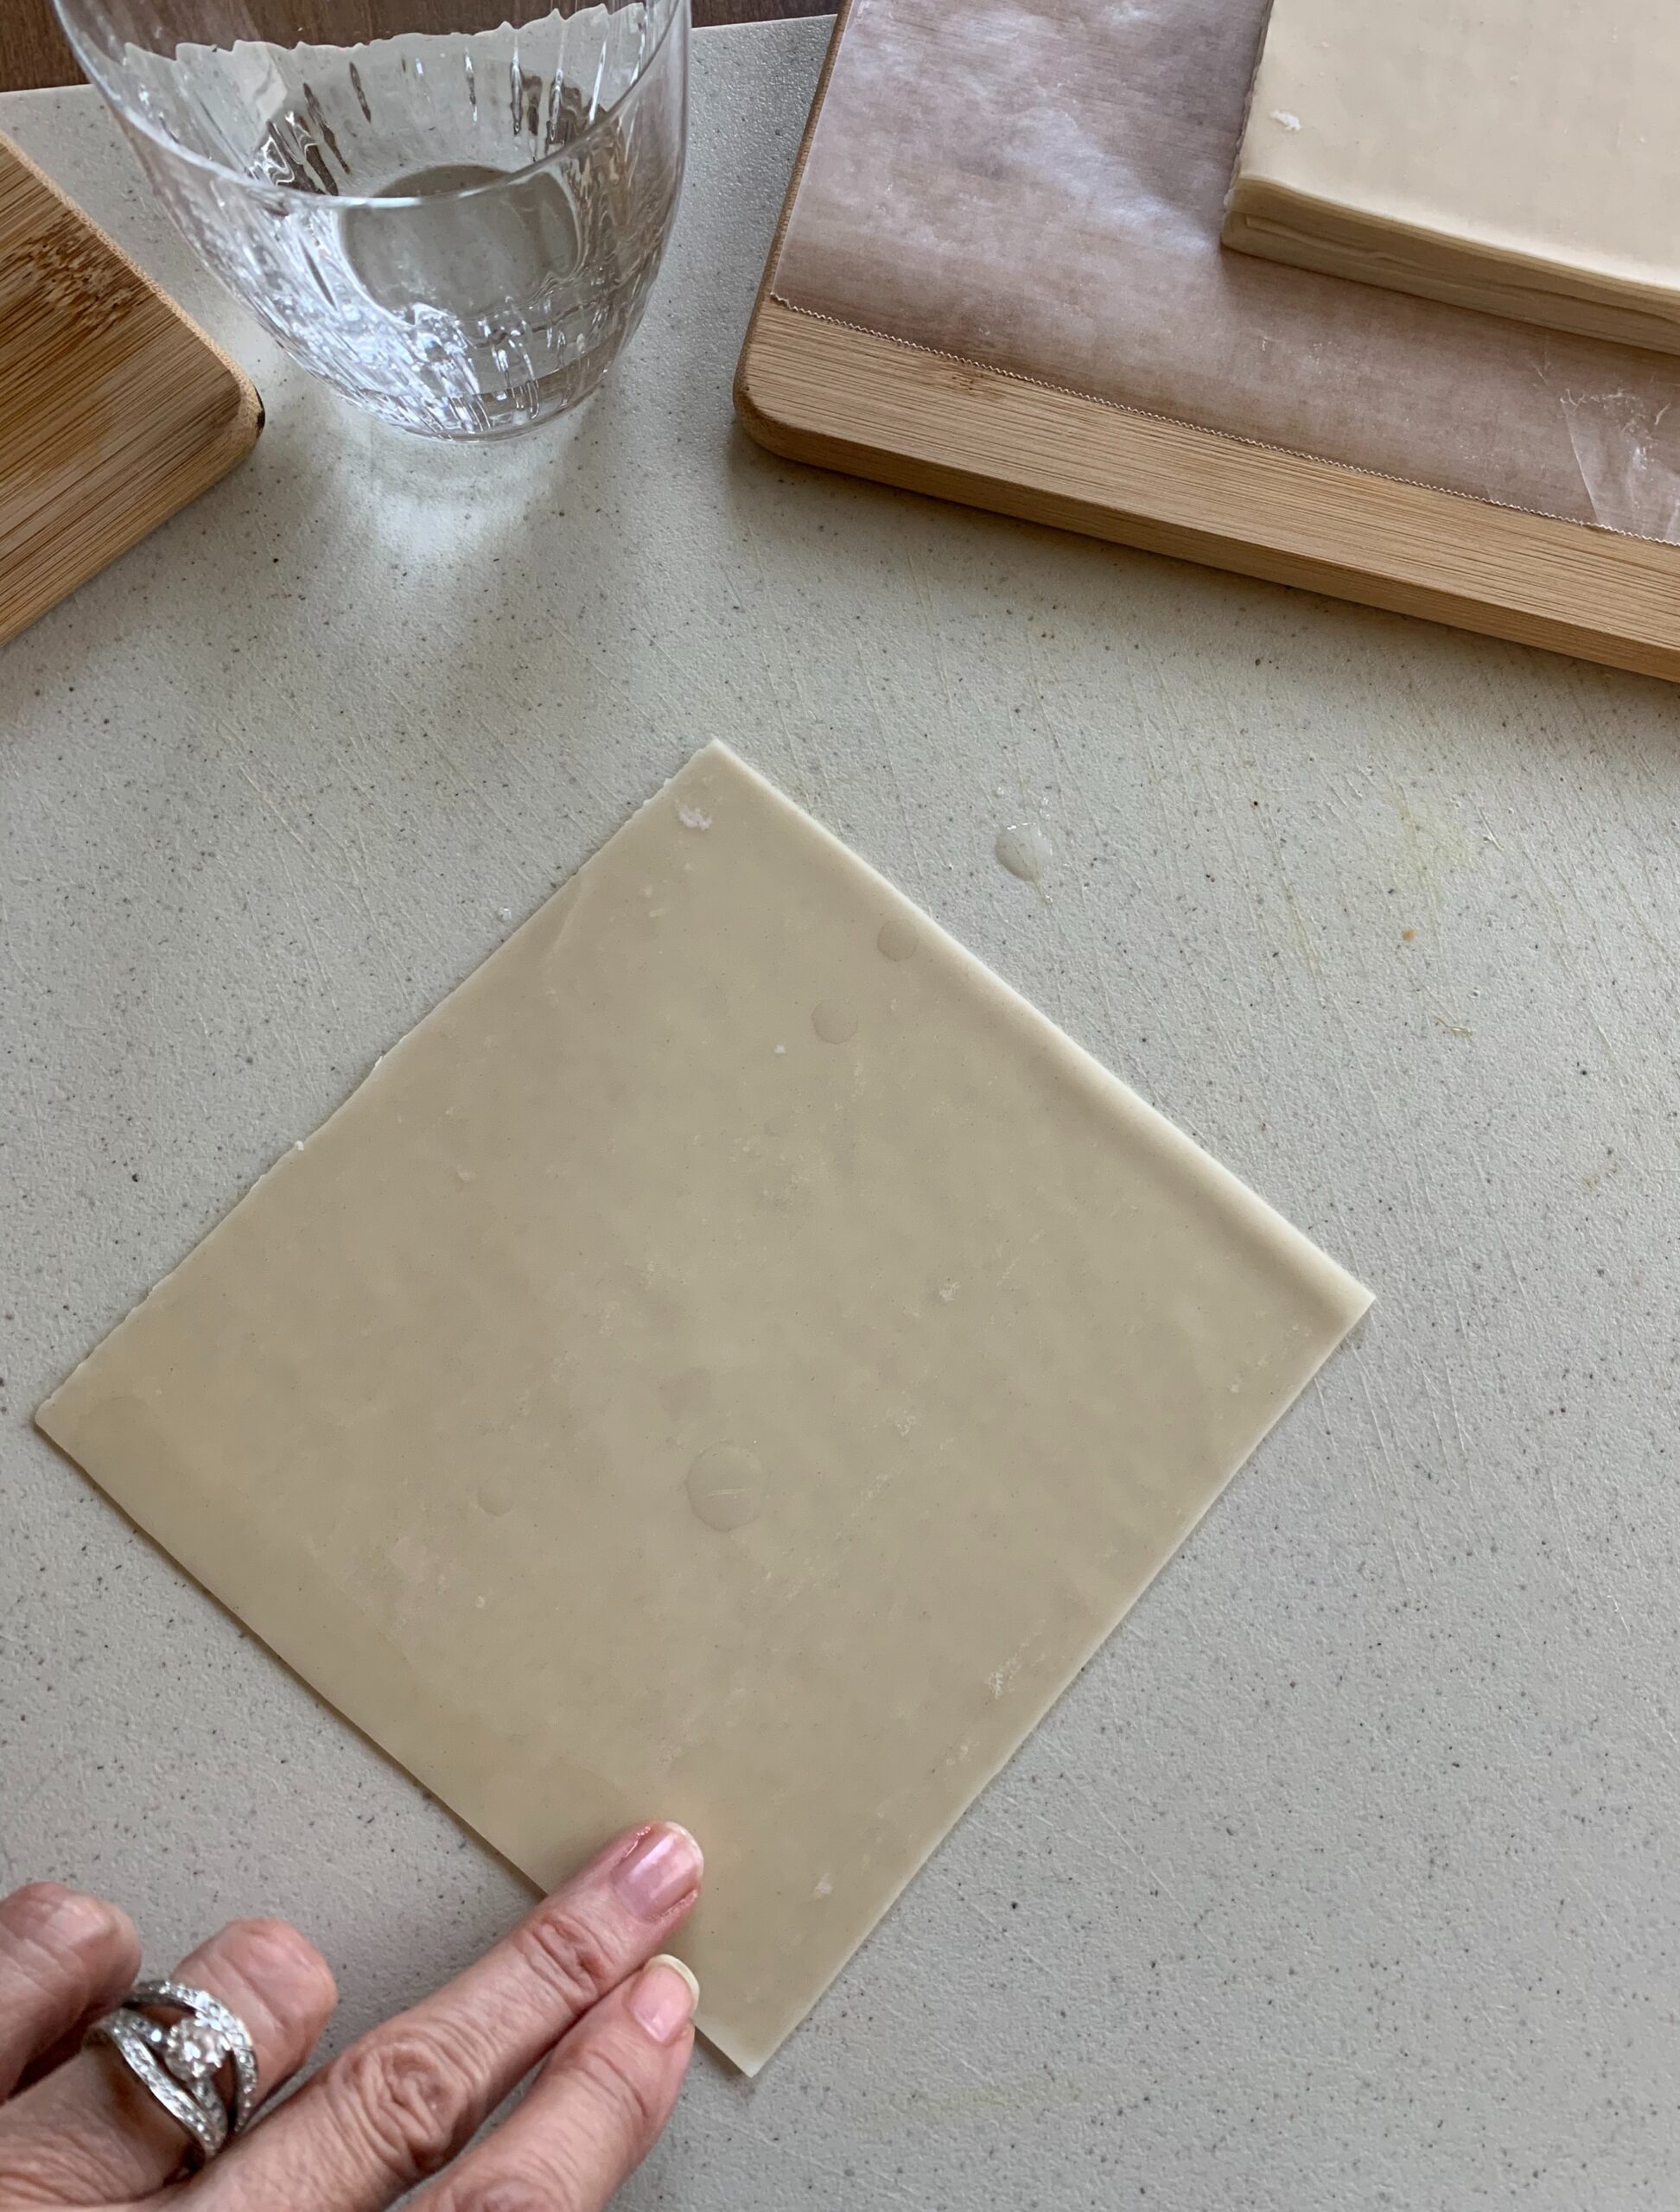
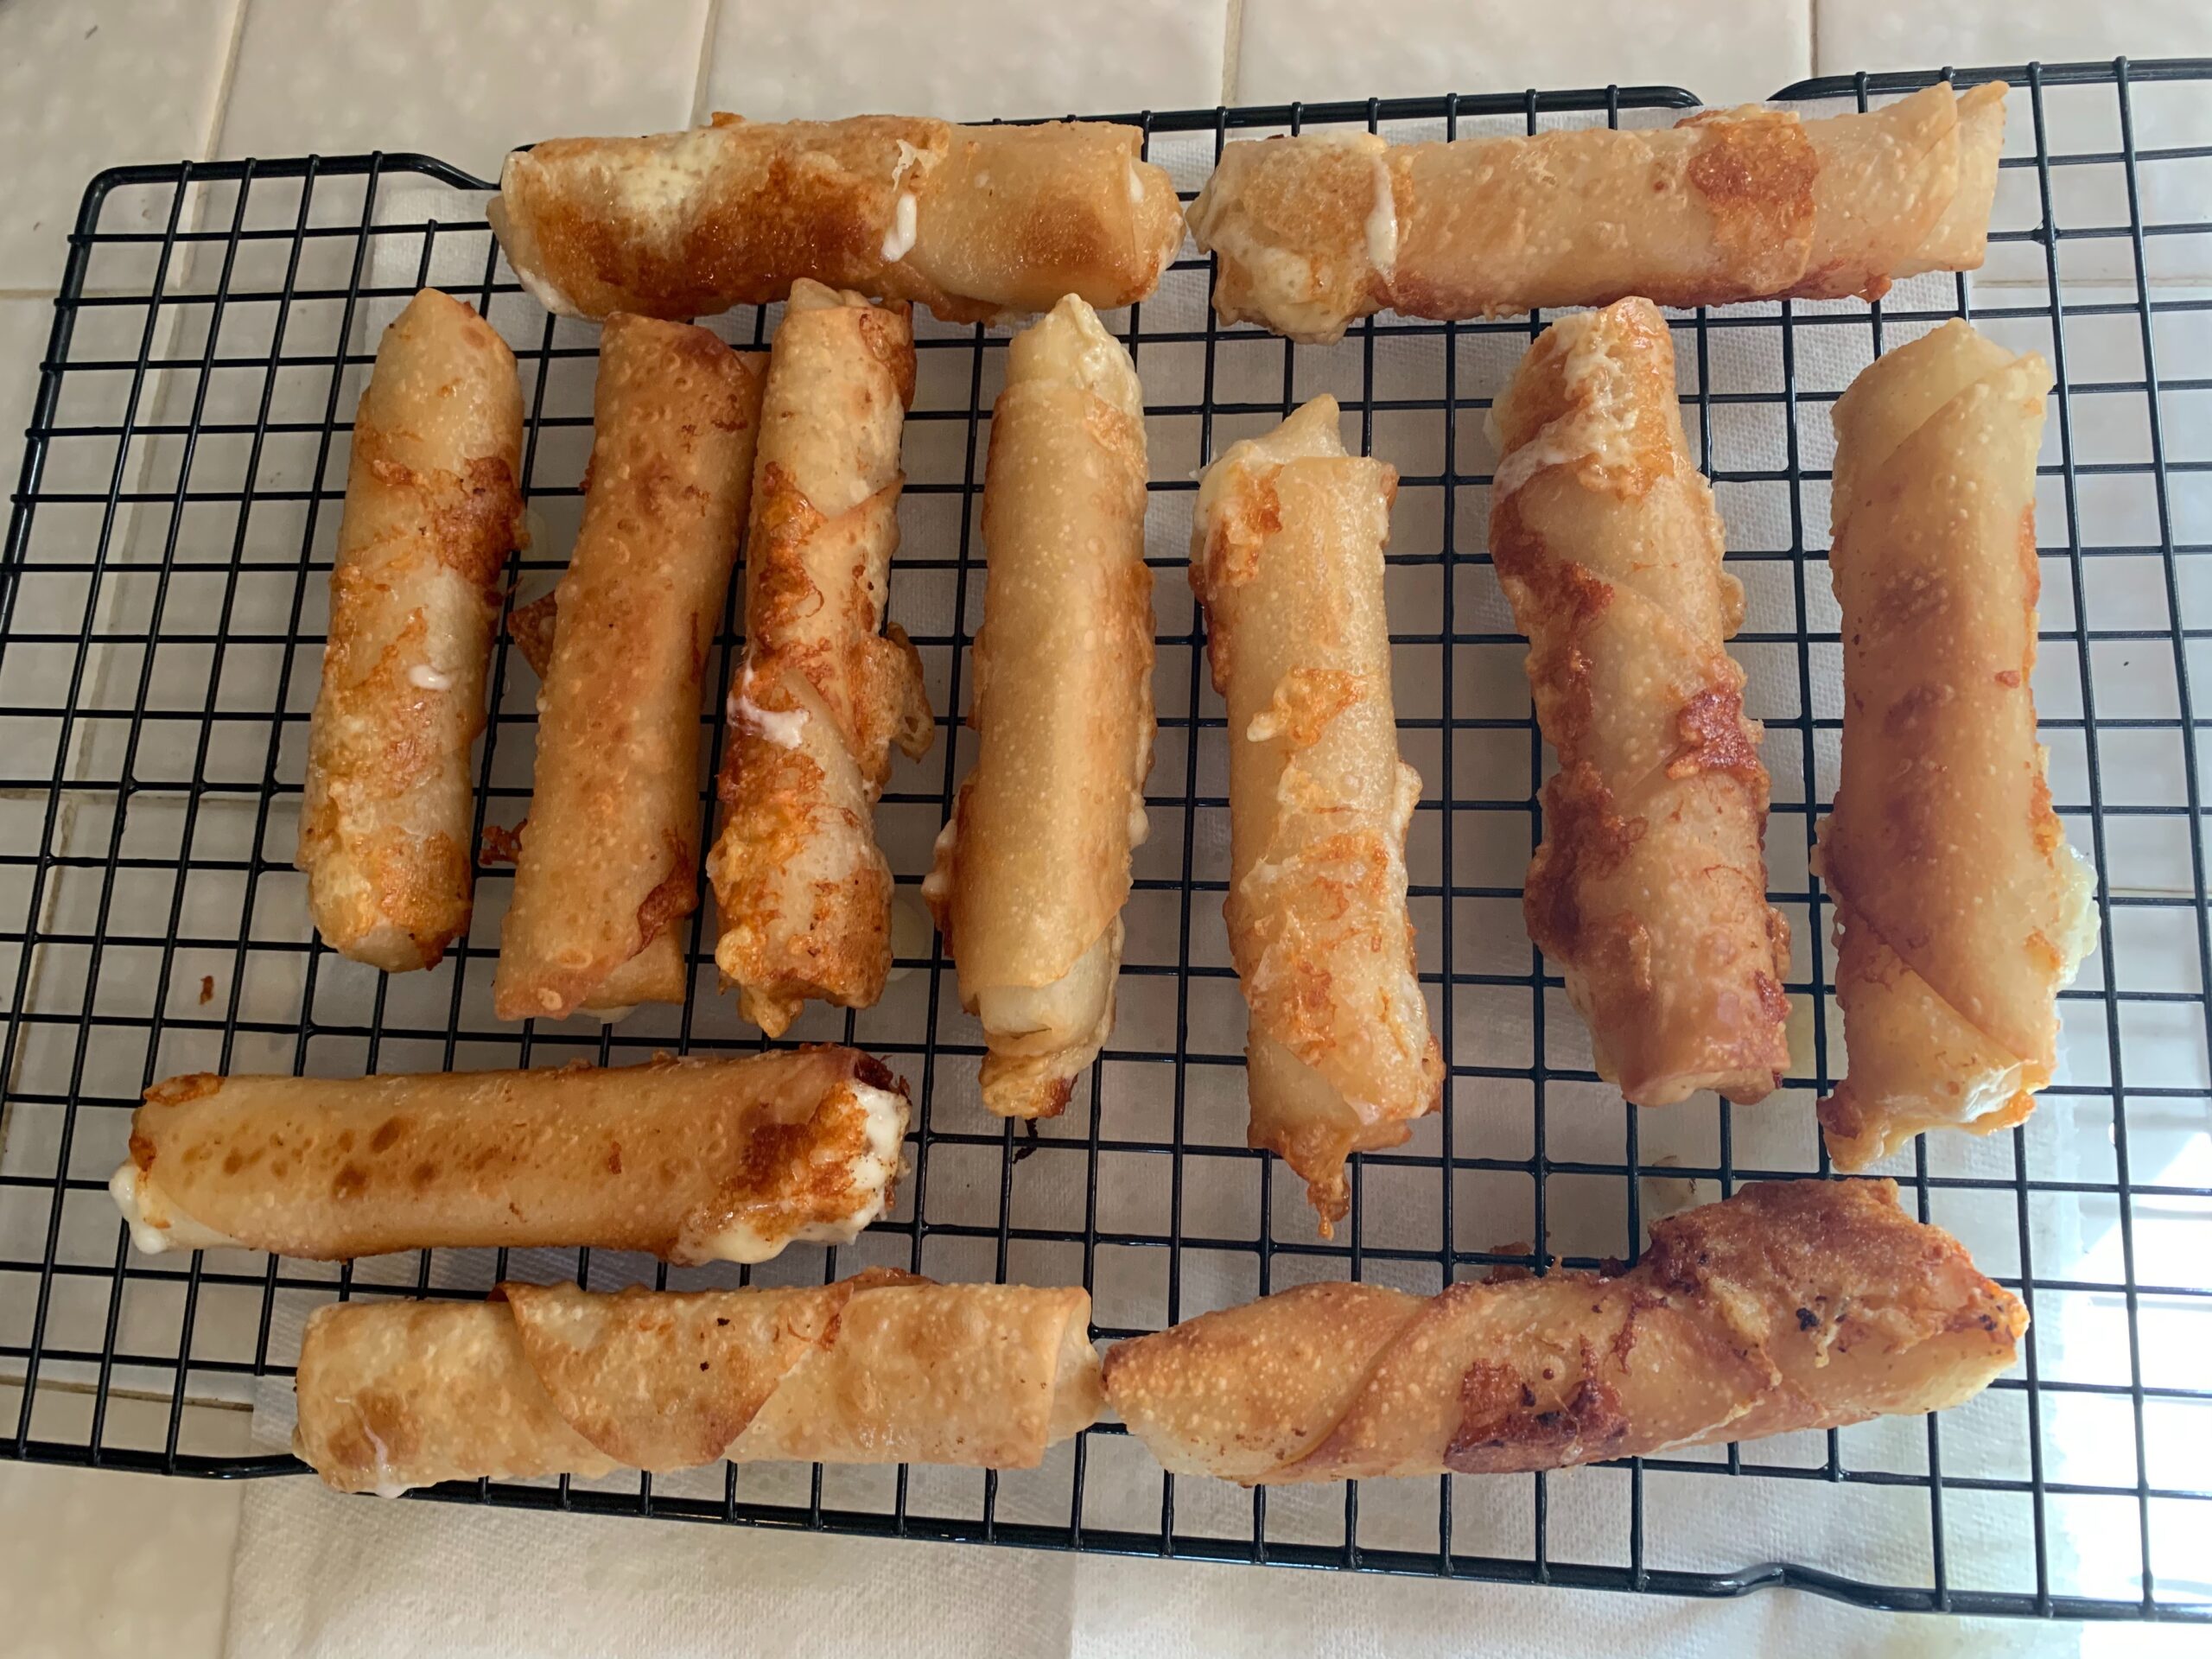
I removed the string cheese from the wrappers and placed them onto a small bamboo cutting board. Repeating the process with the egg roll wrappers. Dampen a piece of paper towel and lightly cover the egg roll wrappers. This will prevent them from drying out, making them easier to work with. Partially fill a small drinking glass or measuring cup with water.
Wrapping
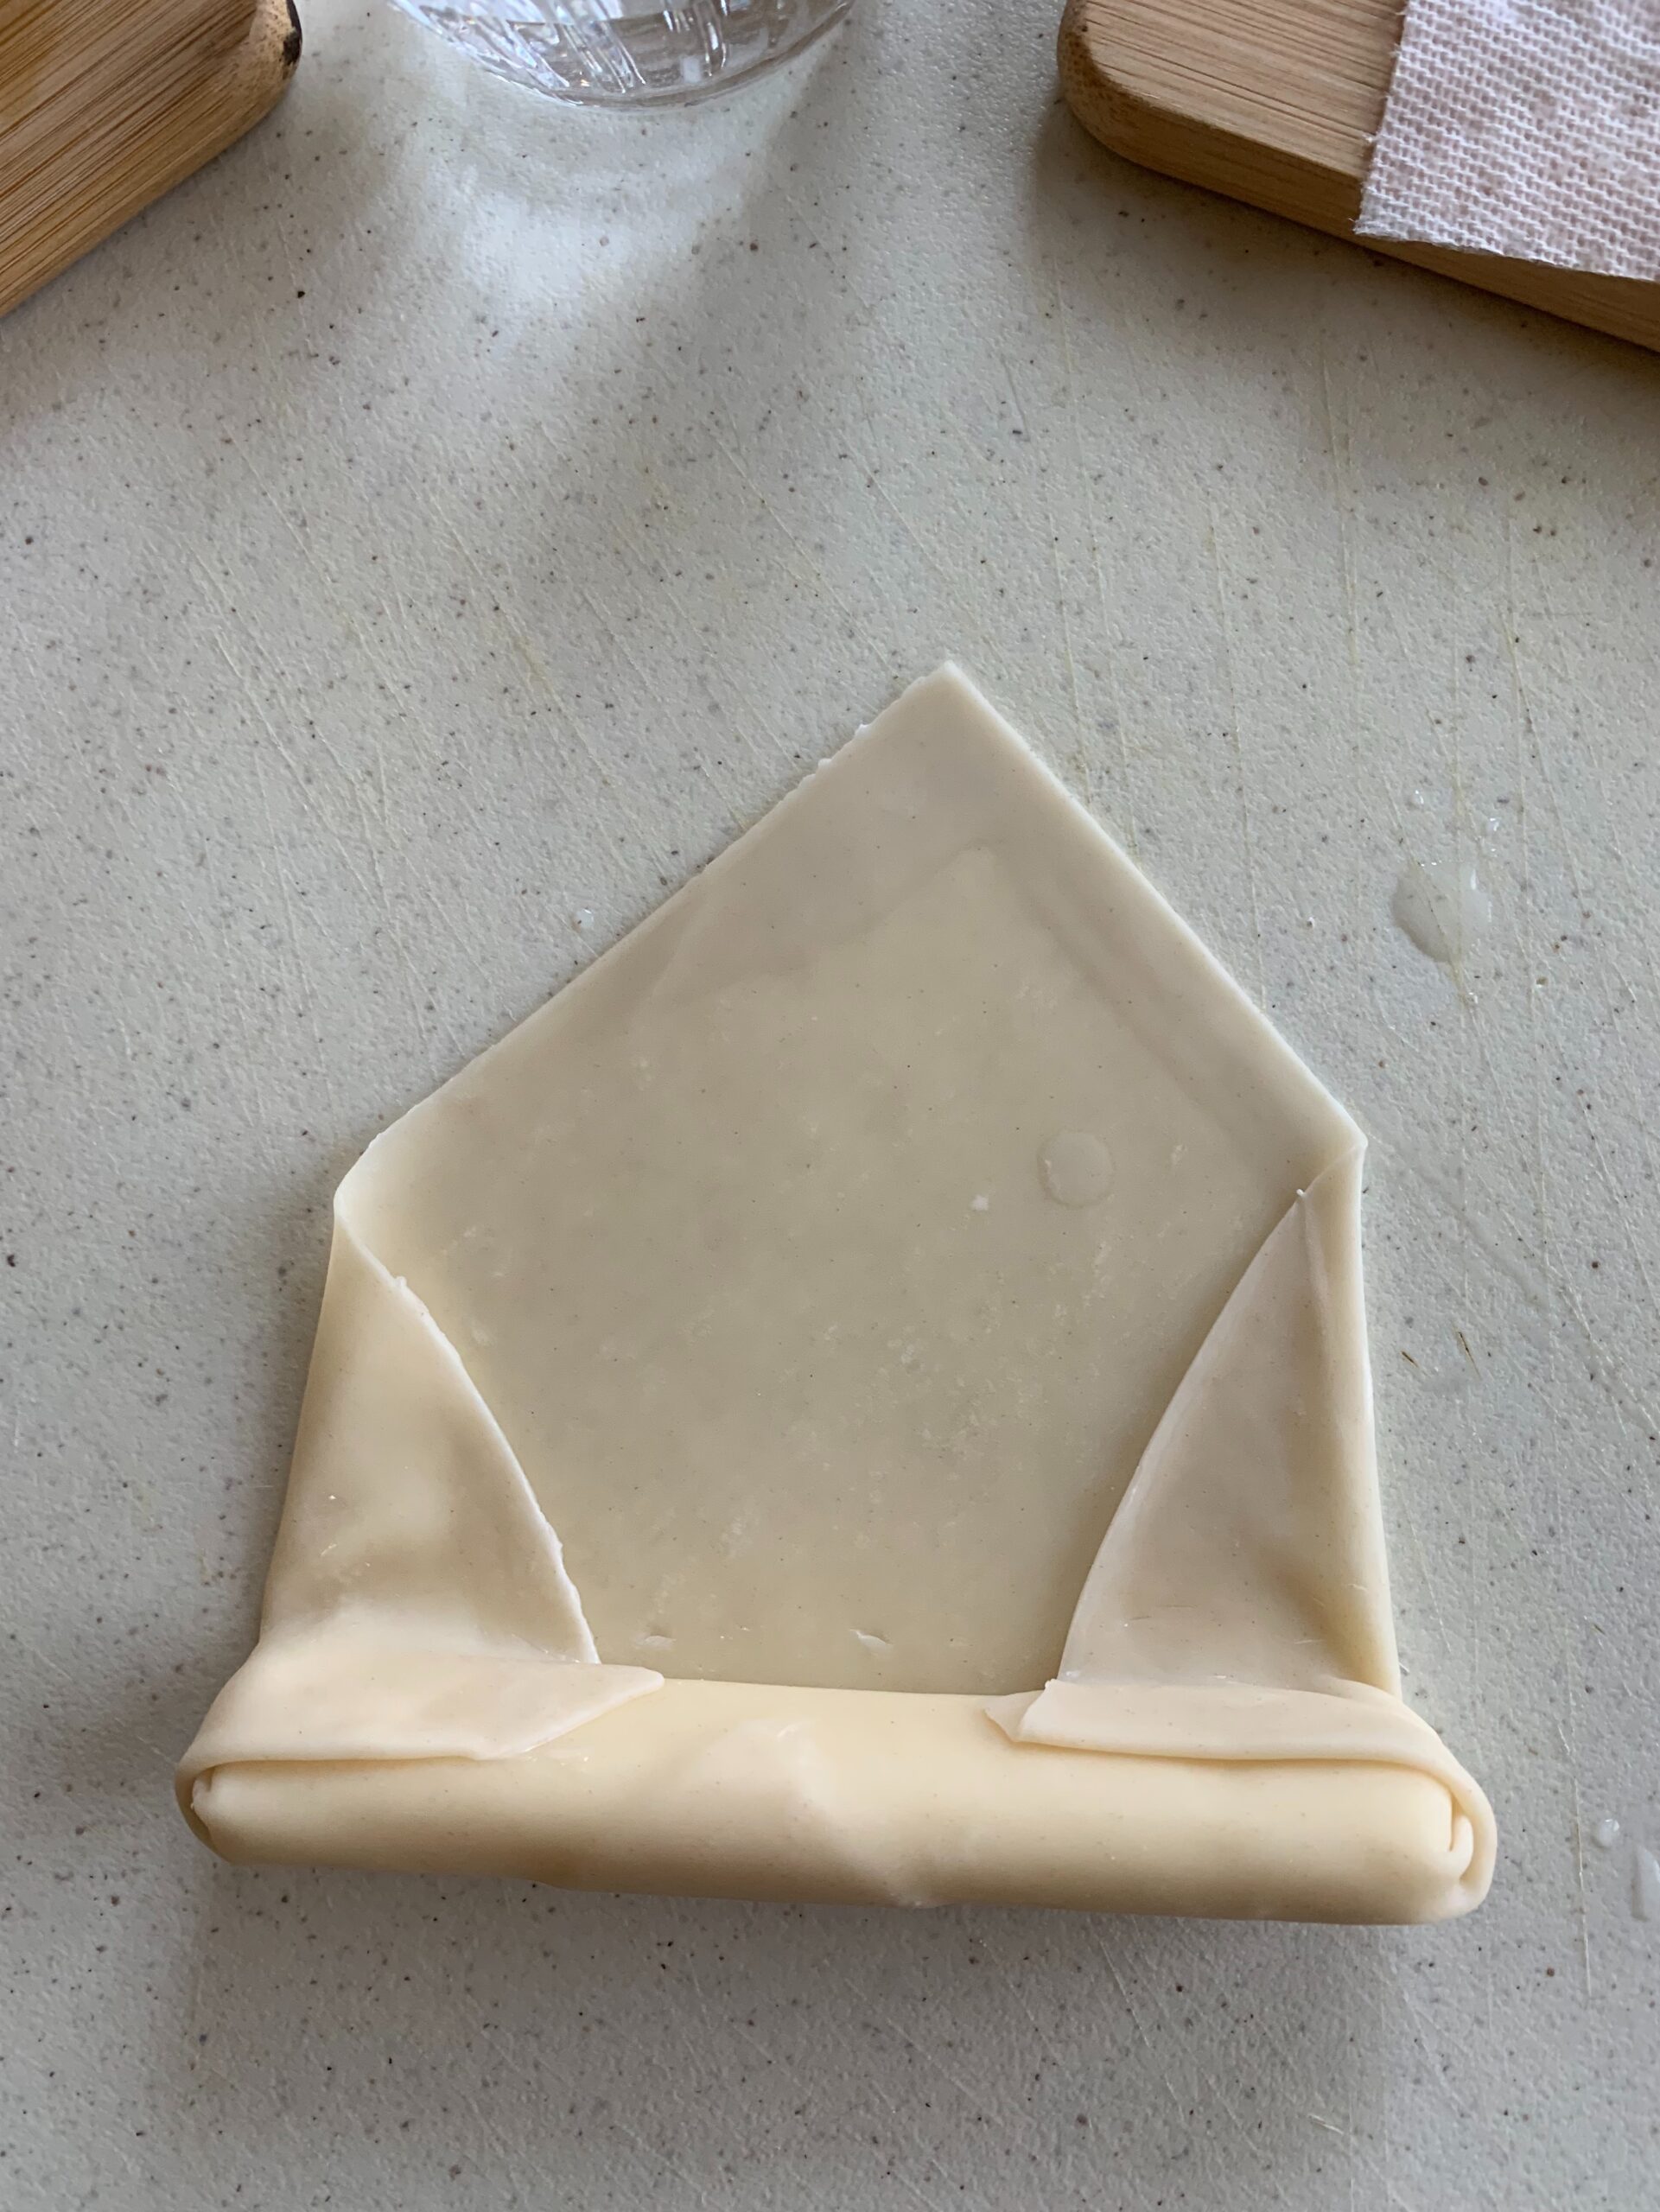
Place an egg roll wrapper diagonally onto your work surface. Dampen your finger(s) and lightly run them around the edges of the egg roll wrapper. Next, place one string cheese diagonally and on top of one corner of the egg roll. Begin rolling the wrapper tightly around the cheese. Continue rolling until you reach the halfway point. Then fold the wrapper points snuggly onto the cheese. Finish rolling up the egg roll and be sure the end is sealed securely. Easy, right?
Place rolled cheese wrap onto a small cookie sheet or cutting board and continue wrapping the remaining mozzarella cheese sticks. Leave space between the cheese sticks when placing them onto the cookie sheet or cutting board.
Time to Chill
Place your tray or board into the freezer for a minimum of 20 minutes. I prefer one hour but, it’s up to you. What works best for you?
Are you curious why they need to chill? It’s my experience that as the cheese heats it will ooze out. You don’t want that. If it’s chilled first the oozing is less likely to happen. Now don’t be concerned that the cheese will remain frozen or even partially frozen. It heats to deliciously ooziness but, within the wrapper.
Heating it up
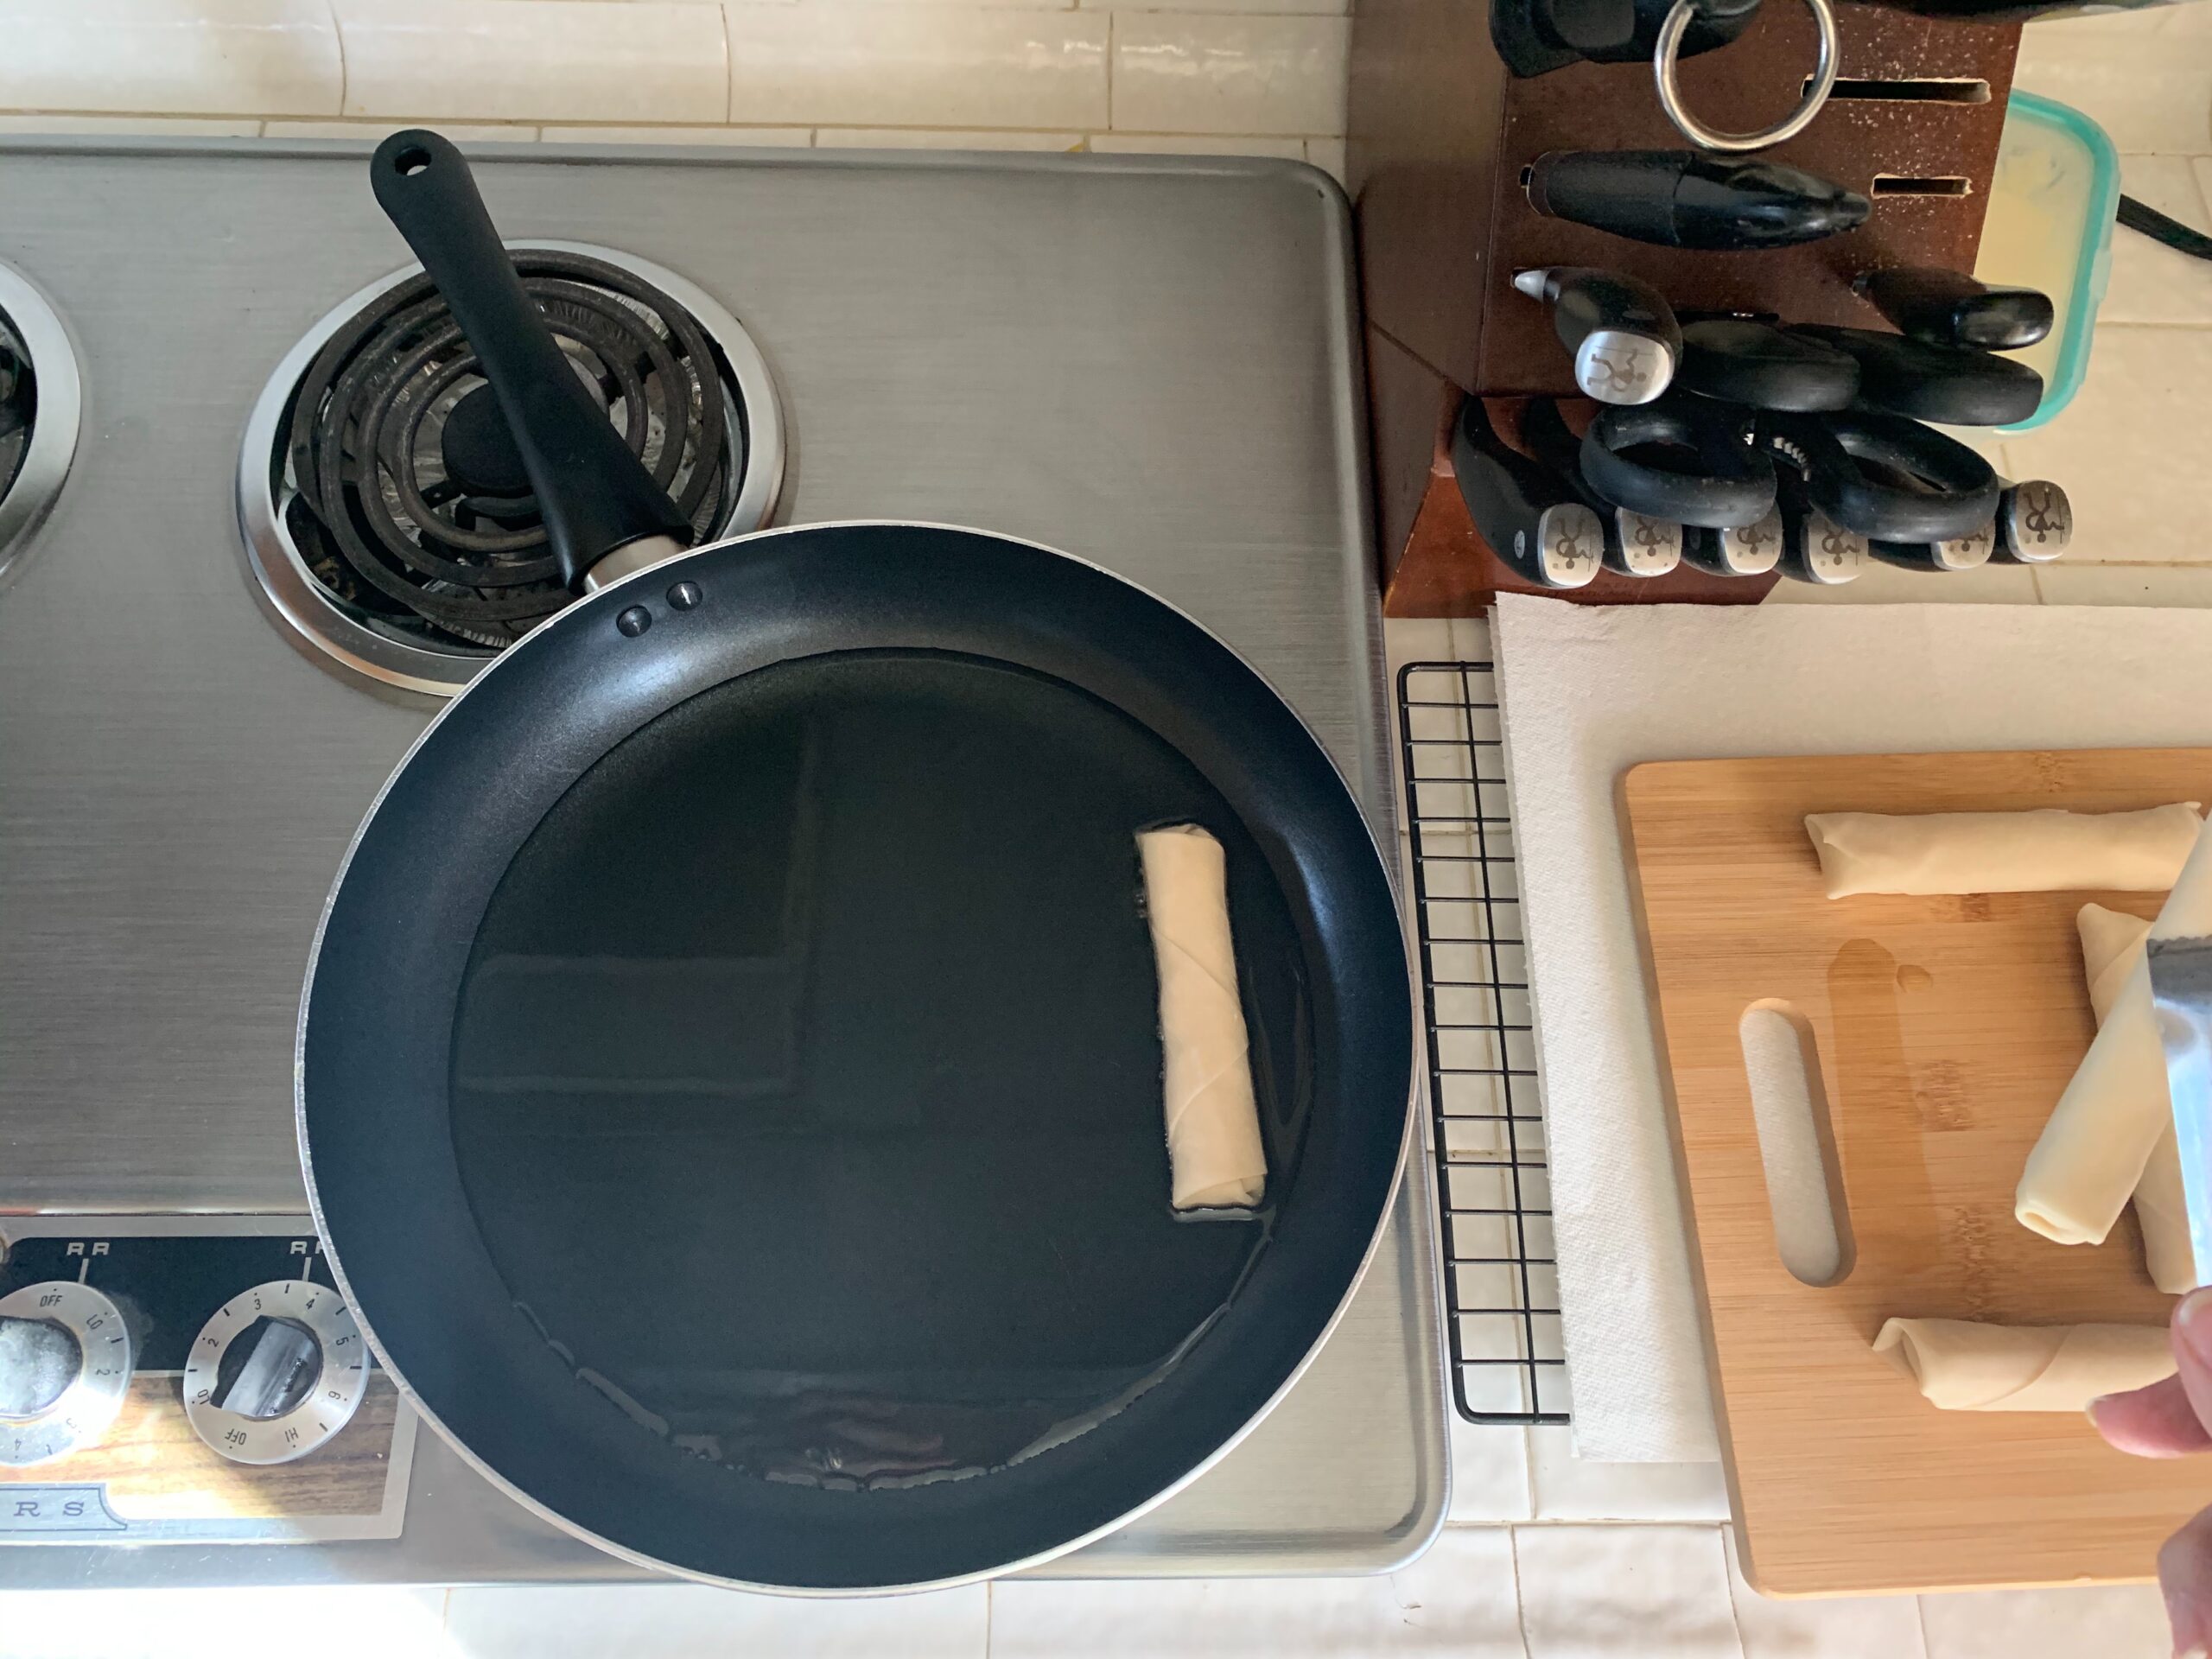
Fill a frying pan with enough oil to reach at least halfway up the cheese sticks. It’s even better if they float slightly. Depending on the depth and size of your pan about ½ to 1 inch of oil. Heat the oil filled pan over medium heat.
While you wait and near your stove stop, place a single baking cooling rack over a few pieces of paper towel.
Frying
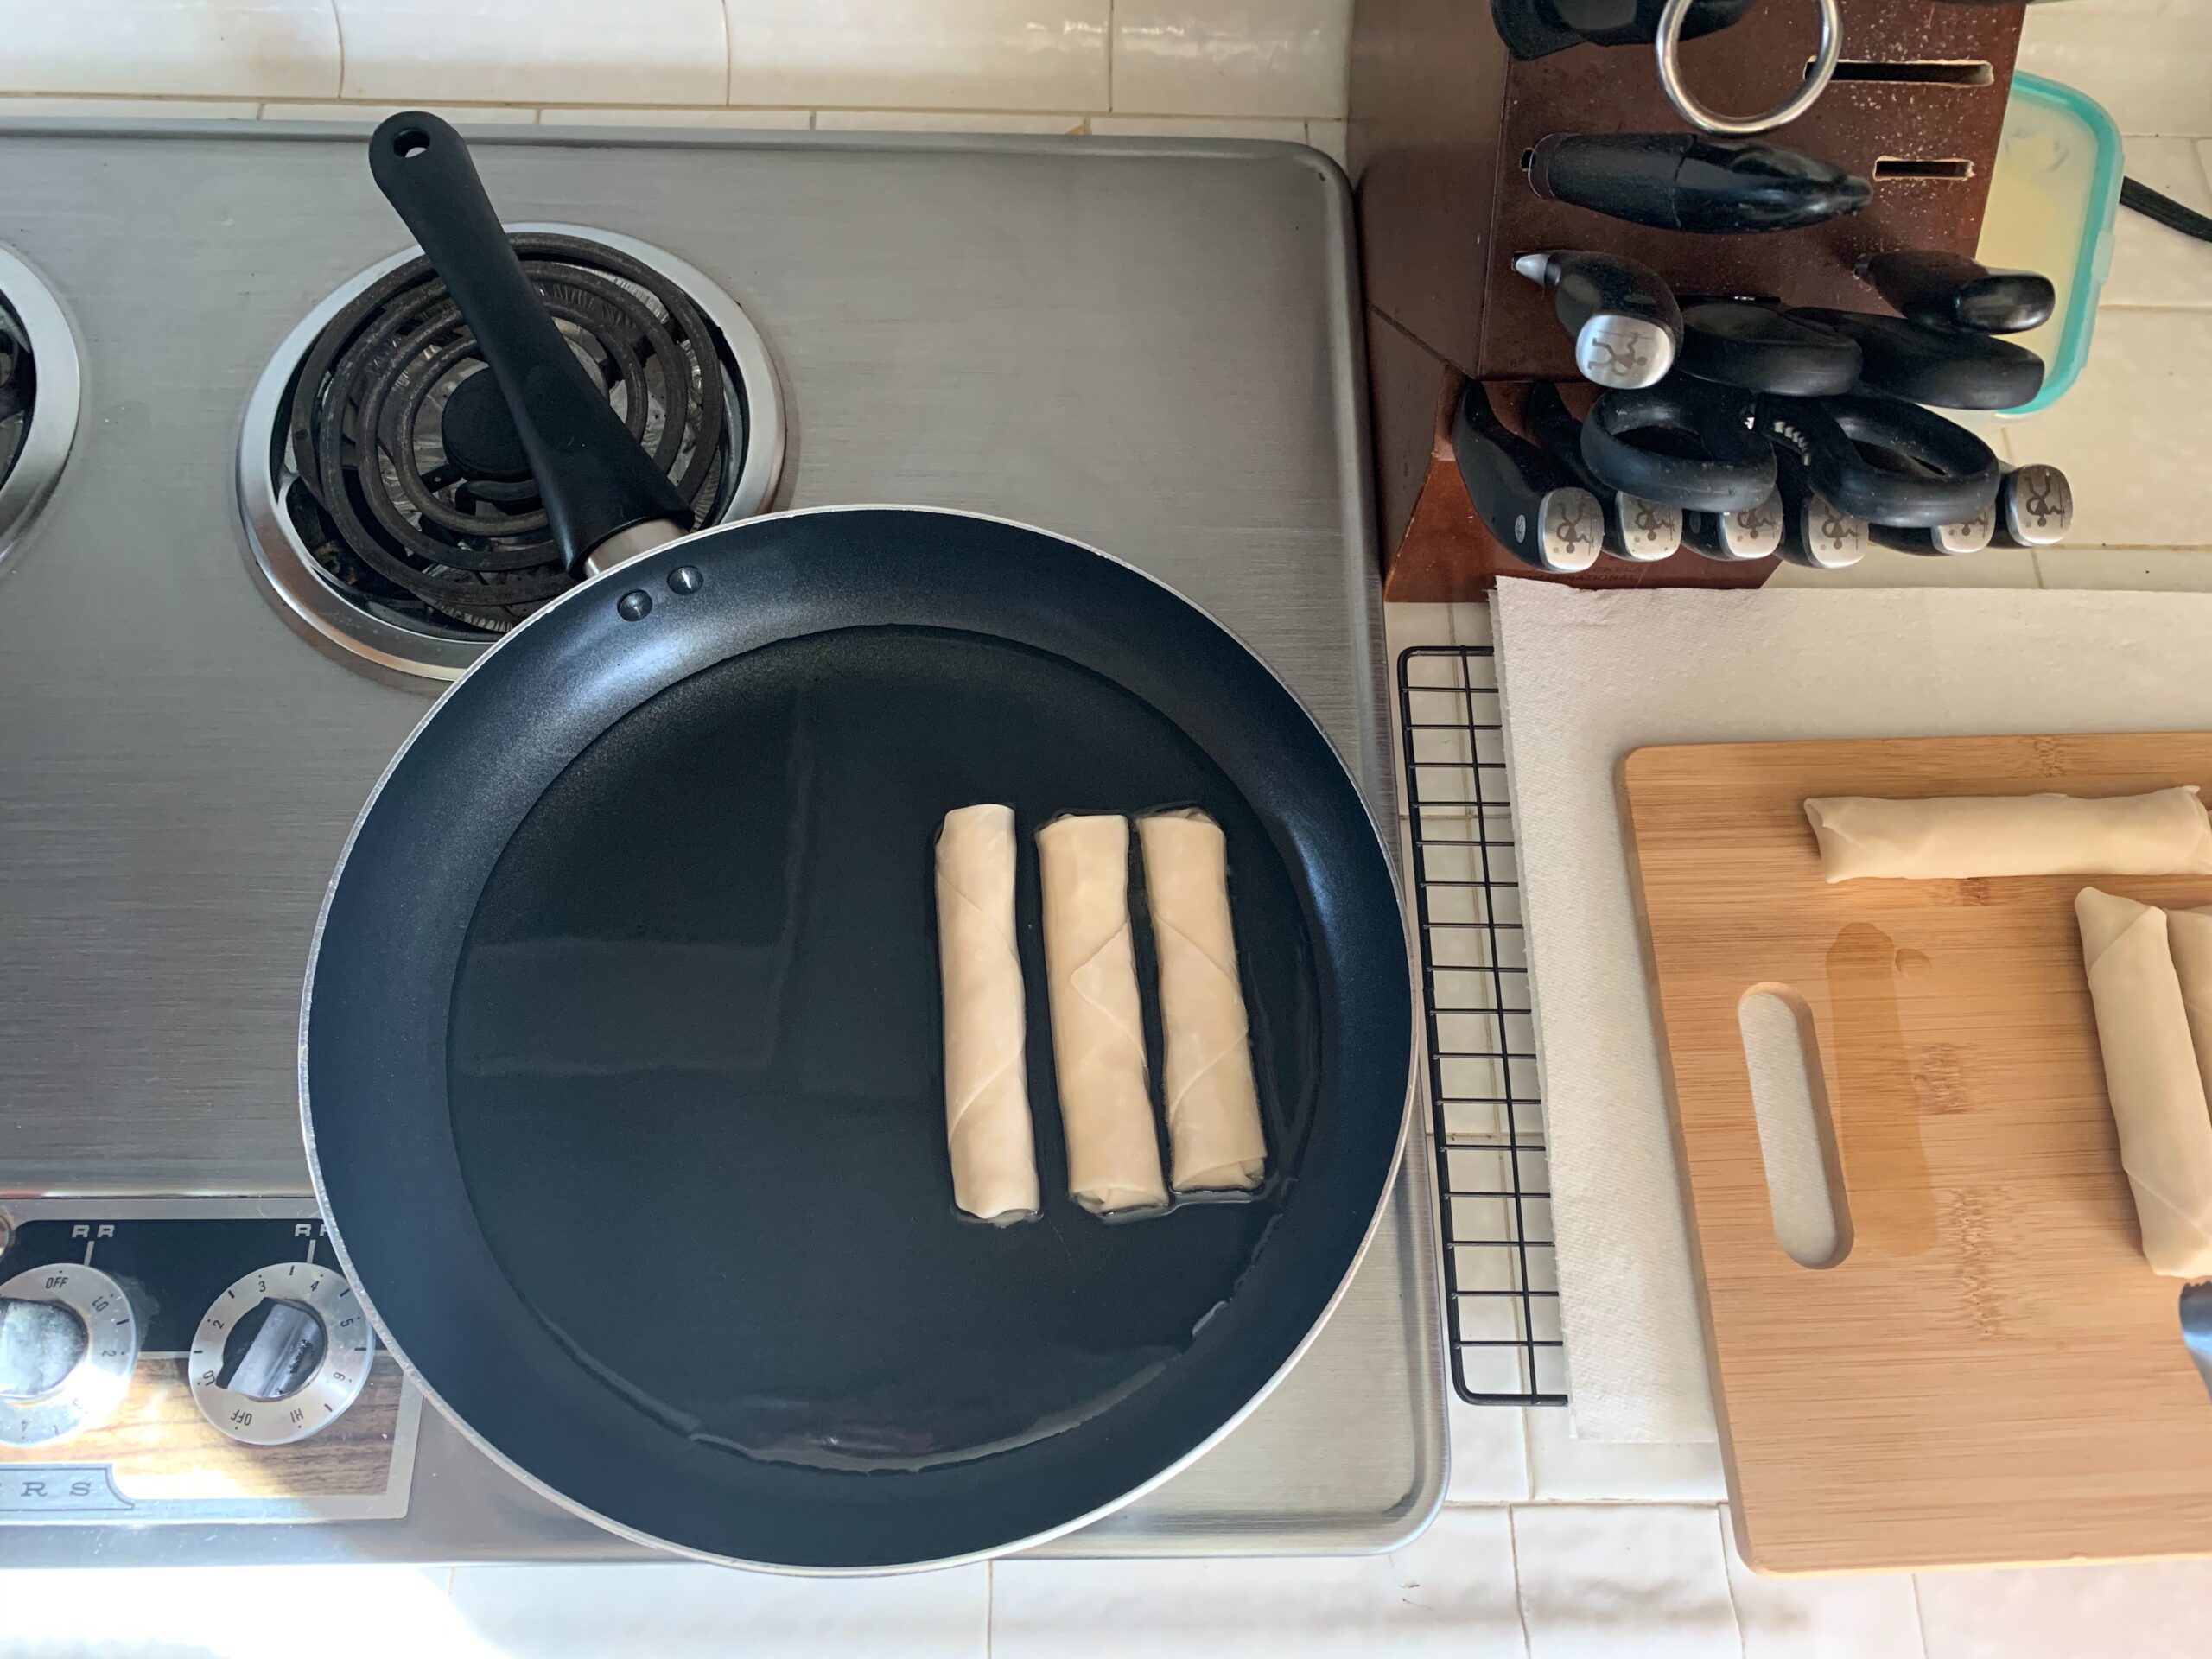
When the oil has thoroughly heated remove the cheese sticks from the freezer and begin slowly adding them to the heated oil. Because they are frozen the oil temperature can reduce quickly. After placing a cheese stick into the oil I’ll wait until the oil is bubbling around it before placing the next one in.
Fry the cheese sticks until they are golden, turning frequently. It’ll only require a few minutes before they’re done, then remove them to the cooling rack to cool and drain off any excess oil.
Dipping Sauce
There are several ways to heat the marinara sauce. I decided on the microwave. Be sure to heat it in a microwave safe dish or container. I usually place a dampened paper towel over my dish to help with splatters while warming.
Marinara isn’t the only sauce you could use for dipping. I personally enjoy a good ranch dip and I know others who prefer something with spice or heat like a flavorful salsa or hot sauce. There are many possibilities. What’s your favorite dipping sauce?
The Taste Test
These cheese sticks are a nice break from the more traditional variety. The fried egg rolls were flaky, with a slight crunch just before tasting the melted cheese within. I found these to be delicious with or without a dipping sauce. I wasn’t the only one enjoying these. So did my husband, daughter and son-in-law.
Little Heart
Are you curious if our grandson gave these a try? He did! But, just one taste. He decided he preferred just the mozzarella string cheese. Was I disappointed? No way! I was one proud Noni (italian slang for grandmother). This little man jumped right in without hesitation to help prepare these fried cheese sticks. He did everything except the frying, some things are best left to Noni. Oh yea, don’t forget he tried them. Ding, ding, ding a win!
Recipe
By now, you all know I’m not a recipe developer, I’m a recipe tryer. I found this recipe on the Food Networks Website. After a quick search for quick and easy recipes I decided on one from Food Networks star, Ree Drummond. Yep, the Pioneer Woman herself!
I wanted a recipe adults would enjoy and one easy enough for my grandson to help make. Full disclosure, I made this once, photographed it and then decided it was a good candidate for Wednesday afternoons with my grandson.
It’s important to set my grandson up for success and why I tried this recipe first. What a success it was! He was so proud of himself and excited that both his parents tried and liked what he’d made. Since this recipe is simple enough for a 5 year old, don’t you want to give it a try? Drop your thoughts in the comments area below and let me know what you think!
Photography
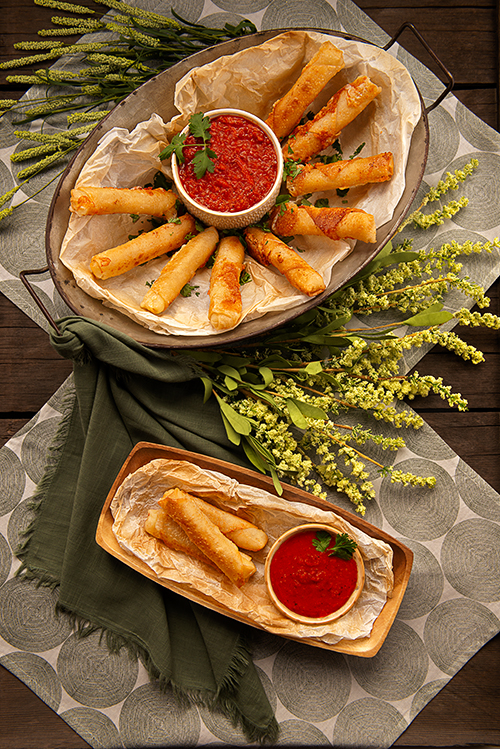
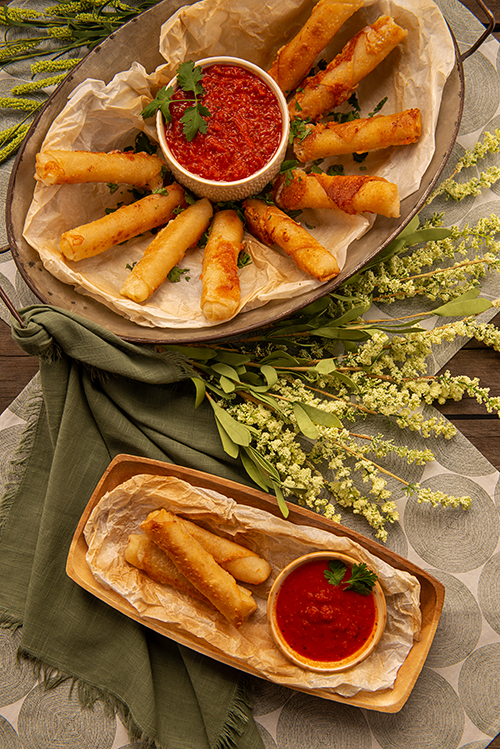
What I love most about cooking is photographing it. For this set I began with an aged wooden grape tray for the background. The aged wood with it’s slightly raised grain determined this would have a rustic feel. Continuing with this design I added a large oval metal tray with handles and a small oblong wooden tray.
Fabrics
Next came fabrics to visually soften the set. My first fabric is square shaped, with deep sage green textured circles set on a creamy white background. I turned two squares of fabric so they mimicked overlapping diamonds and laid them smoothly on top of the grape tray. A solid deep dark green sage fabric with frayed edges was loosely tied to one of the handles on the metal tray.
Folds and Ties
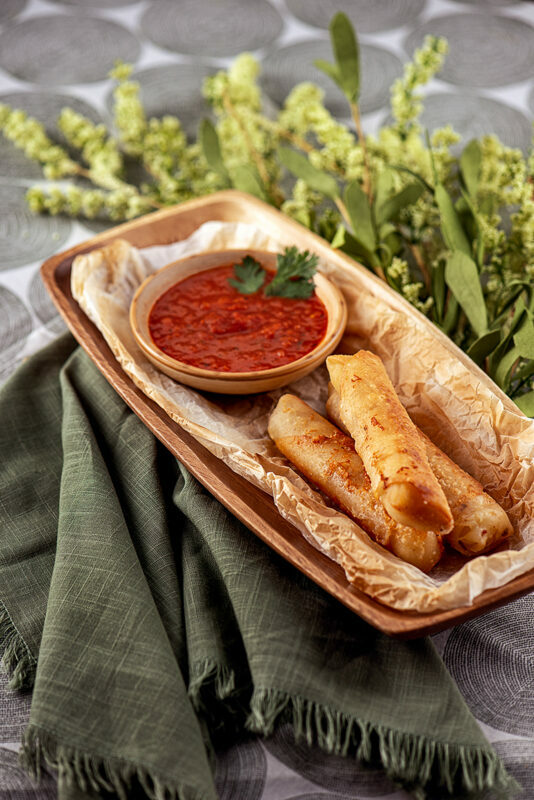
I’m meticulous with the placement, folds and ties of my fabrics. There are many reasons for this, such as; directing your eye to follow the fabric towards the ‘winner’ dish or food, softening hard lines, as accent colors complimentary to the food and sometimes just to fill space. By using soft folds and drapes of the deep green fabric it acted as a frame for the oblong wooden tray and my winner fried cheese sticks.
Lining
My plates, so to speak, were pre-selected earlier and I’d determined their overall placement within my set. The idea of laying the cheese sticks directly on their surface just wasn’t enough. After considering my options, I decided on a parchment paper liner.
Using the parchment paper directly from the roll didn’t fit my design. But, crinkled, rolled, and oven baked worked. Once I was satisfied with their distressed condition and shape, I popped them into my oven for toasted baked in color.
Plating
Each tray was given its own size appropriate bowl of marinara sauce and the Fried Cheese sticks were artistically arranged near or around them. To that I sprinkled on chopped parsley and added springs to each marinara bowl.
Finishing Touches
I love how flowers can soften, accent or create a lovely frame in a set design. I especially love using live flowers from our gardens. But, I have no problem using lovely floral sprays found at many craft stores and that’s exactly what I did here. My choice has a just picked wildflower feel and I arranged two color coordinated sprays around the larger metal tray. To me, it added the final picnic touches to this set. What do you think?
Great remarkable issues here. I¡¦m very satisfied to see your article. Thanks so much and i’m having a look forward to touch you. Will you please drop me a e-mail?


7 Responses
Thank you! Hope to see you around the blog again, soon.
Wow! I love the way how your post is soo detailed! And those images! they are beautiful!
Thank you!
We appreciate your visit and comment.
Hope to see you around the blog soon.
These look so delicious and your instructions seems simple to follow. Thanks for sharing! Can’t wait to try them.
Thank you.
I recently made these twisting a 1/2″ strip of prosciutto around the cheese. Delicious!
Great remarkable issues here. I¡¦m very satisfied to see your article. Thanks so much and i’m having a look forward to touch you. Will you please drop me a e-mail?
Thank you!